Blog Page 19

Round Frames: Different Types Of Siding To Choose For Your Chicago Home

When it comes to choosing the perfect siding for your Chicago home, there is a range of options available. From classic vinyl to rustic wood, selecting the right material is an important decision that can have long-lasting aesthetic and structural implications.

When you’ve selected a siding for your home, you can get in touch with a Chicago home siding installer to get the job done. Let’s take a look at a few quality options for your home.

Vinyl Siding

Wall with images in living room
Used with permission of Melanie Gowen

Vinyl siding is a popular choice among Chicago homeowners due to its affordability, durability, and low-maintenance requirements. It is made of polyvinyl chloride (PVC) and comes in a wide range of colors and textures to match any home style. Vinyl siding can be installed quickly and easily by professionals or DIYers, making it an ideal option for those looking for a fast home makeover.

When properly installed, vinyl siding provides excellent protection from the elements. It is resistant to mold, mildew, UV rays, extreme temperatures, and other weather conditions common in the Midwest. Additionally, it requires little maintenance apart from the occasional cleaning with soap and water to remove dirt or debris. Vinyl siding also has good energy efficiency properties which can help keep heating and cooling costs down during extreme weather conditions.

Metal Siding

Metal siding is another option for Chicago homeowners looking to update the exterior of their homes. This type of cladding is typically made from aluminum, steel, or copper and provides a unique look that can be customized to match any home design. It is also extremely durable and can last for decades with proper care and maintenance. Additionally, metal siding offers excellent energy efficiency as it reflects heat away from the home in hot weather and helps keep the interior warm during colder months.

The cost of installing metal siding will depend on several factors such as materials used, the size of the house, and the complexity of the job. Generally speaking, it tends to be more expensive than vinyl but may be worth it in some cases due to its long-term durability. Metal siding also requires little maintenance apart from occasional cleaning with a mild detergent solution to remove dirt or debris buildup over time.

Fiber Cement Siding

Fiber cement siding is another great option for Chicago homeowners looking to upgrade their home’s exterior. This type of cladding is made from a mix of wood fibers, Portland cement, and other materials that are fire-resistant and durable enough to stand up to extreme weather conditions. It also offers excellent insulation benefits, helping to keep the interior of the home warm in winter and cool in summer. Additionally, fiber cement siding is non-combustible and therefore a great choice for those living in areas prone to wildfires.

Fiber cement siding is available in a variety of colors and textures, making it easy to customize it according to your own personal preferences. Unlike metal siding, which requires painting every few years, fiber cement can be stained or painted with ease – allowing you to change up the look of your home without having to completely replace the entire cladding system.

Wood Siding

Living room with big firework
Used with permission of Alice Lane

Wood siding is another popular option for Chicago homeowners looking to upgrade their home’s exterior. Wood siding offers timeless beauty, durability, and insulation benefits that make it a favorite choice among many homeowners. It also has a natural look that can be tailored to any style of home.

The initial cost of wood siding may be higher than other types of cladding materials like vinyl or metal; however, with proper maintenance and care, this type of siding can last up to 40 years or more. Wood siding requires regular painting or staining in order to keep it looking good; however, this can also be used as an opportunity to customize the cladding system according to your own personal preferences.
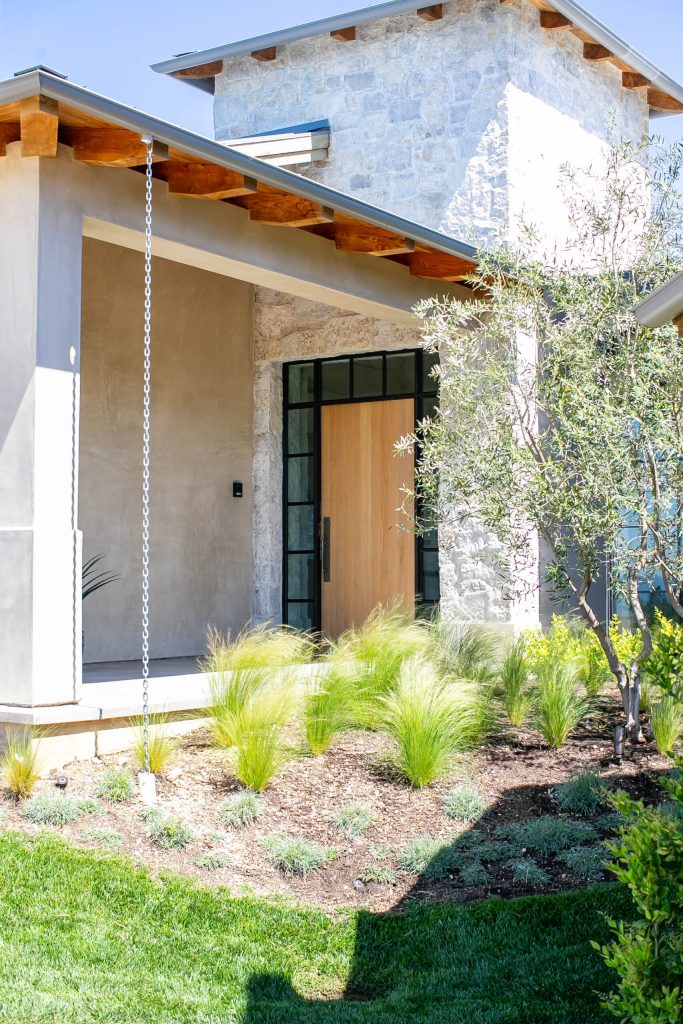
Stone Veneer Siding

For those who prefer the look of stone but are not able to afford the cost of real stone siding, stone veneer siding is a great alternative. Stone veneer siding is made from a combination of concrete and other materials that mimic the appearance of real stone. This type of cladding offers an attractive, durable, and weather-resistant finish for Chicago homes.

Stone veneer siding is available in a variety of colors, textures, and shapes to match any home’s style. It is also relatively easy to install when compared to other types of cladding materials such as wood or metal. Stone veneer siding provides excellent insulation benefits while still providing an elegant look that can last for many years with minimal maintenance required.

Stucco Siding

Part of the bright designed living room with chair, table and pillows in the basket below the table, and a mirror on the wall above the table with flowers and books
Used with permission of Lisa Furey Interiors

Stucco siding is another popular choice among Chicago homeowners looking to update their exterior. Stucco is a type of plaster made from sand, cement, and lime that is applied in multiple layers over a stable base such as wood or metal siding. It adds texture and color while creating an attractive finish for any home.

The installation of stucco requires skilled labor and specialized tools, making it more expensive than other types of cladding materials like vinyl or stone veneer. Once installed however, stucco offers superior protection from the elements along with excellent fire resistance capabilities. Stucco also has a longer lifespan when compared to other types of siding materials, making it an excellent option for those who want to invest in durability and aesthetic appeal for their Chicago home.

The selection of siding for a Chicago home must be made with care due to the city’s climate. Each material has its own set of advantages and disadvantages that must be taken into consideration before making a decision.

Thanks to allstarwindowsiding.com for consulting on this post.

Advantages of Purchasing a Freestanding Basin

A freestanding basin, even known as a pedestal basin, is a kind of sink that stands on its own without any sort of support from a cabinet or countertop. This kind of basin has become increasingly popular in recent years due to its absolutely aesthetic appeal and practical perks.  You can shop for freestanding basins in Australia and ensure you have one for your space. 

Bathroom with designed bath tub, mirror and sink
Used with permission of Melanie Gowen

If you are not sure about such a purchase then you should walk through the following advantages to get convinced to buy a freestanding basin:

Space-Saving

One of the biggest advantages of getting freestanding basins is that they take up less space than traditional types of vanities. Since they don’t need any cabinet or countertop for support, they are perfect for smaller bathrooms or even powder rooms where space is simply at a premium.

Aesthetically Pleasing

Freestanding basins are a gorgeous addition to any bathroom or powder room. They come in a huge range of styles, shapes, and even sizes, making it somewhat easy to find the perfect match for your décor. Whether you prefer a sleek modern look or even a more traditional style, there is a freestanding type of basin that will definitely fit your needs.

Good level of Accessibility

Freestanding basins are a great and useful option for individuals with mobility issues. Since they don’t really require a cabinet or countertop for support, they are more convenient to access than traditional vanities. This can be especially advantageous for older individuals or the ones with disabilities.

Proper Versatility

Freestanding basins are very versatile and can be used in a diversity of settings. They can be installed in a bathroom, powder room, or even a laundry room. They can even get used in commercial settings such as hotels or even restaurants.

Customizable option 

Bathroom with blue wall decorations
Used with permission of Emily Followill

Freestanding basins can be really customised to fit your specific needs. They can be even made in a variety of materials such as porcelain, evan stone, or glass. They can even be customised with different finishes, such as matte or even glossy.

Easy to Clean

Freestanding basins are absolutely easy for you to clean since they don’t have any sort of hard-to-reach corners or crevices. This makes them a hygienic preference for any sort of bathroom.

Durability is impressive 

Freestanding basins are incredibly durable and even can withstand years of use without showing any sort of signs of wear and tear. They are formed up of high-quality materials that are resistant to scratches and even stains, making them a smart investment for any sort of home or commercial setting.

Eco-Friendly option 

It is also true that freestanding basins are an eco-friendly type of option since they require less materials to manufacture and install. They also make use of less water than traditional vanities, which can help reduce your water consumption and even lower your utility bills.

Cost effective purchase 

White designed bathroom with shower
Used with permission of Melanie Gowen

Freestanding basins are definitely a cost-effective option compared to traditional vanities. They demand less level of materials to manufacture and install, which can save you a lot of money in the long run.

Unique in nature 

Freestanding basins are surely a unique addition to any bathroom or powder room. Since they don’t really need a cabinet or countertop for support, they can get designed in a wide range of shapes and even sizes. This makes them a wonderful choice for homeowners who wish to add a touch of personality to their overall bathroom.

Conclusion 

To sum up, freestanding basins are definitely a good choice for any home.  Since you know some of the many advantages, go for it!

Thanks to cassbrothers.com.au for consulting on this post.

The Ultimate Vacation Checklist

Summer is just around the corner. Bathing suits and flip-flops hang on store racks, and you can feel the days get longer. While you may still be weeks away from summer vacation, planning ahead on a travel organization app is a great way to extend the life of your vacation mood and help your travel plans get off on the right foot!

Here is our checklist for creating the ultimate vacation, regardless of the season.

Pick A Destination

Photo by Lopez Robin on Unsplash

Maybe there is that one spot you must go to every year; your soul just yearns to be there. On the other hand, you may be an adventurer and prefer to avoid traveling to the same place twice. One of the first things to do is decide on a destination.

There is no shortage of travel inspiration on the internet! Whether you are looking for a classic cozy cabin in snowy woods, or warm sun and sand, the options are endless. Social Media is a great place to start, as countless travel blogs describe destinations filled with gorgeous and enticing scenery. 

Research information on a given location for each season: knowing the weather and environment is essential, as well as any events in the area that you and your party may wish to enjoy.

With a list of potential choices, narrow them down by considering the pros and cons of your top options. You can also list everything you want to do in those locations. If you are traveling with family or companions, include them in this process! This is a great way to get everyone excited about the trip and ensure there is something for everyone.

Schedule a Time

Whether it’s a weekend getaway or an annual family resort trip, consult your calendar to help decide the best time for your trip, considering the season and climate. If you are staying at a resort or vacation rental, check their policies on minimum night stays or durations in advance.

Consider the best way to maximize your available time off. You can gain extra time on your trip by leaving on a Friday instead of a Sunday; however, traveling on weekdays is often less expensive and hectic than on weekends.
Also, don’t be afraid to consider travel dates outside the norm and away from holiday weekends. Making slight adjustments to your schedule can profoundly impact what activities you can add to your list. It will also ensure you get to do everything you hope to do.

Choose Transportation

Poppy modern farmhouse living area
Used with permission of Patterson Custom Homes, Brandon Architects and photographer Darlene Halaby

After you have the “where” and “when,” next up is “how.” This part may seem like a technicality, but eliminating the stress of travel can make your vacation run smoother and fill in the gaps of downtime.

Regardless of your transportation choice, line up some entertainment for your travel days. A great book or road trip game can make time go faster. No rule says you can’t create memories while going to better places!

When your destination is within driving distance, you may find an old-fashioned road trip in order. Take advantage of your travel route; if you can pass through an area with attractions you like, work these into your itinerary. Stopping at an aquarium or a space center will not only stretch your legs but can also add some bonus fun to your vacation plans and break up the monotony.

Feel free to look at smaller local events, too – you may pass through during a town’s annual fruit festival, for example. You can never tell what may end up being a fun family memory for years to come.

Select Lodging

Another item on our checklist that impacts your vacation is where you will stay. From campsites to luxury hotels, there are plenty of factors to consider.

You want to choose a location that feels like it’s part of the reason you chose this vacation. Whether it’s the full resort with an on-site water park, an area with delicious restaurants, or easy access to your favorite theme park, choose a place that works for your plans and contributes to your enjoyment.

Remember to consider AirBnB as well as VRBO as you search for accommodations. While a house on the beach may not have the full-service amenities of a resort, they offer a laid-back, homestyle atmosphere. Plus, the option to stock a kitchen and cook meals will alleviate some of the costs and free up some time for fun!

As you decide on lodging, look through all amenities and services available at each location. There may also be different fees and contract agreements in some cases, so reading through the options will ensure you know what to expect and prevent a headache later on!

Plan Activities

Designed home office with desk, plant and chair
Used with permission of Breeze Giannasio

In many cases, the activities available in a particular destination are the reason for traveling there! Ski resorts, water parks, and theme parks draw millions of visitors annually.

Even if you know you are going to a specific park, look at other activities in the area. You may find seasonal celebrations or hidden gems in the area many overlook. Check local calendars or social media for more information on what else to do.

Think outside the box! You may be in a coastal location that highlights the beach, but there are often fun water sports activities if you look slightly inland or a little further down the road. It is also a great way to have some backup activities in mind if the weather impacts your plans.

Have a Meal Itinerary

After you have mapped out some ideas for where to stay and what fun things to do, it’s time to plan for meals. 

If you have a tight itinerary of events, look for quick service options. But if you have time to explore while you’re in town, evaluate the menus for different restaurants in the area.

Consider eateries popular with locals, whose menu has something for everyone in your party. Many places have websites and photo reviews, so sort through them; you may find options that add extra magic to your trip! 

Alternatively, consider stocking the kitchen and prepping picnics or quick meals where you are staying. This will save time and money and add a new level of relaxation to vacation.

Make Arrangements for Home

Living room with big firework
Used with permission of Alice Lane

A necessary evil of travel planning is to make arrangements for everything back home. Coming up with a plan for pets or plants early in your vacation planning will allow you to focus on the highlights without worrying about home. 

Installing a couple of extra portable cameras around your home before leaving can give you additional peace of mind if you want to check on things while away. You could also find a trustworthy person near your home who can check on it or be an emergency contact. Ensure they have the information and access they need beforehand, and write out any instructions for clarity.

The Bottom Line

The most crucial factor in creating the ultimate vacation is to make plans that will have something for everyone! Whether the purpose is to relax or experience new thrills, taking the time to explore options, fill in the gaps, and eliminate stress beforehand will allow you to make the most of your time. Checking off as many boxes on everyone’s wish list as possible will leave you all fulfilled while recharging your batteries.

Thanks to all the companies linked above.

Setting Your Easter Table with Wow

Easter is a time for family and friends to gather together, embracing a message of renewal. Spring has arrived or is so close you can feel it. The entire palette of the landscape is changing from dirty browns and grays towards the verdant and even beginning to blossom with color. We want to fling open our windows and doors to let that freshness into our environments that have become dusty and stale from months of being cooped up.

This is an exciting opportunity to have a merry meal with those important to us, welcoming them into our newly bright homes for an afternoon of camaraderie and good home cooking. Understandably you want your table to reflect all this liveliness but how exactly do you instill that Easter feeling into your dining room? What are some ideas that work together to make a festive and functional place to celebrate this season?

Easter eggs on a wooden background
Image by AdelinaZw from Pixabay

Color comes to mind right away – Easter eggs, jelly beans, the plumage of returning songbirds, sprouting bulbs, and reawakening leaves on trees. Adding pastel napkins to your place settings certainly will do the trick but what if we go vertical? Creating varied tiers of engagement not only maximizes your surface area but creates a Mad Tea Party, storybook staging. Accomplish this by picking out various sizes and colors of Mosser Glass cake stands from Weston Table, and get stacking. Mix and match these cheery milk glass pedestals to create multiple layers of serving stations for your guests.

Build a tower of appetizers that can then be removed and replaced with your side dishes stacked one atop another. You could build a veritable candy-colored forest with each tier offering a different part of the meal – maximizing your space as well as your wow factor. So don’t think of these stands as just for desserts. They are capable of launching your meal visually into the stratosphere.

Now that we have some playful variety, how about looking for some continuity across the table. Let’s look in an unlikely but very effective place – flowers. Usually bouquets and centerpieces dominate a spread with various combinations of blooms, giving a vibrant yet varied effect. What if you took all your disparate vases from around the house, spread them throughout your forest of cake stands and filled them each with the same flower? It would be like coming across a carpet of wildflowers in a field. A seasonally appropriate choice could be a bulk order of lilacs from FiftyFlowers. You can select from white, shades of purple, or even a two-tone flower.

Yellow tulips
Image by Krysten Merriman from Pixabay

If you absolutely must introduce some variety into your flowers, a mixture of the lilac colors is available in a single bundle, jazzing up the original concept a little. Imagine the eye-popped looks you’ll get from your guests as they take in this lush carpet of color – not to mention the intoxicating smell. Don’t take the time to take a class in flower arranging when you can achieve an even more wow-inducing effect with a few armfuls of the same stem.

An Easter meal wouldn’t be complete without some kind of chocolate treat. Just because we may be past the age when it’s socially acceptable to run around the house or yard, filling a basket with as many confections as we can doesn’t mean we should be counted out of the sweet Easter bounty. So why not integrate this into the tablescape and let guests eye the meal’s finale expectantly throughout? Chocolate bunnies and eggs from L.A Burdick not only perfectly fit the holiday brief but these gourmet handmade goodies are exquisitely delicious.

Adorable in their narrow, pale green box, several of which you could boldly line up along the center of your spread, they may be even cuter individually peeking out from amongst the cake stands, integrating the hunt right into the architecture of your decorations. Why not put a mini basket at each place setting so folks can gather whichever chocolate they eye throughout the meal, anticipating the time when they’ll be able to give into temptation and finally take a taste? Dessert as decoration sounds like a rather wow-inducing statement.

Chocolate bunny
Image by Jill Wellington from Pixabay

So while having a set of bunny ears for each person at your table may make for an Instagram-ready dinner, the above suggestions embrace the season in some unconventional ways but together are sure to evoke an environment of merriment while being exciting for the eyes and other senses, too. The Mosser cake stands from Weston Table are the foundation of your tablescape, immediately bringing forth excitement through color and height. Populating those levels not only with the elements of the meal but with the spring-evoking lilacs from FiftyFlowers brings the freshness of the outdoors inside and their abundance will almost surely bring smiles to faces.

Frankly, integrating chocolate bunnies and eggs from L.A. Burdick is a win-win in that their precious little chocolate faces peeking out from behind boughs of lilacs can only bring joy – and while they are almost too cute to eat, enjoying their exquisite taste will be the coup de grace for every chocoholic at your table. Have a wonderful celebration of renewal with some new ideas that hopefully turn into traditions for you.

Thanks to all the companies linked above.

5 Simple Ways to Make Your New Home Feel More Comfortable

Moving into a shiny new house in Fort Lauderdale and making it your home – a place of comfort, is like starting a fresh chapter of your life. It’s exciting, nerve-wracking, and filled with infinite possibilities. Whether it’s your first home or your tenth, this animated adventure can make you both anxious and thrilled. Each move comes with unique challenges—the entire process, from the dreadful packing to the chaos of the moving day. There’s a lot to adjust to when you move to a new place.

There are the highs of finding your dream home and the lows of packing up your entire life and carting it across town. The lows are incredibly draining, with the average American spending over 182 hours on moving-related tasks. That’s a lot of time spent packing boxes, renting moving trucks, and finding the perfect spot for that awkwardly shaped lamp.

House viewed from across the street
Image by Pexels from Pixabay

However, despite the gruesome process of moving to your new house in Fort Lauderdale, there’s something exceptional about creating a space that’s entirely your own. When you fully move in and finally sit on your couch with a glass of wine, you’ll know all the hard work was worth it. Here are some ways to boost the process of converting a house into your home.

1. Enlist movers for the long haul

Moving is an excruciating ordeal, but it is ten times worse if you move to a different state. Whether you’re migrating from New York or California, you’ll want trustworthy movers. Suppose you plan to bask in Florida’s coasts and live near the prettiest beach in Fort Lauderdale. In that case, long distance movers in Fort Lauderdale are the necessary professionals to ensure the safe transportation of your belongings through their high-quality packing materials, packing, and unpacking services. These movers can also assist with disassembling and reassembling furniture and handling large, heavy items like pianos or appliances.

Long-distance moves require more planning and coordination than local moves, and you want to be sure that your possessions arrive at your new home safely and timely. By working with experienced long-distance movers in Fort Lauderdale, you can rest assured that somebody will handle your move carefully and professionally from start to finish.

The care and expertise of movers can make the transition to a new home much smoother and less stressful, allowing you to start enjoying your new space as soon as possible. So, if you’re planning a long-distance move, consider working with experienced residential movers to help make your new home more comfortable and welcoming.

2. Declutter your space

Living room with beige colors, sofas, coffee table and TV
Used with permission of Kira David Design

It’s normal to accidentally bring random things you no longer need or use when moving to a new house. However, this can lead to a cluttered and overwhelming space. When you declutter, you streamline your belongings and remove things you no longer need or use, making it easier to navigate and enjoy. Decluttering can be especially important if you’re downsizing or moving into a smaller area where every inch of space counts.

If you have a lot of clutter in your current home, finding things or moving around can become challenging. You might have to navigate around piles of boxes or cluttered shelves, which can be frustrating and stressful. By decluttering before your move, you can start fresh in your new home with a sense of structure. The fewer items you pack and transport, the less time and money you’ll spend on moving supplies and services.

A clean, organized, and clutter-free space also positively impacts your mental-wellbeing, which can help you get comfortable in your new home more quickly. According to a study by Utah State University, a chaotic home environment leads to stress and anxiety. In contrast, an organized and tidy house can promote calm and relaxation. If you don’t feel comfortable in your new home, it’s time for a yard sale.

3. Decorate the walls

Cabinet in the living room and paintings on the wall above
Photo by Spacejoy on Unsplash

Decorating your new home’s walls can make the space feel comfortable, inviting, and uniquely yours. Starting by hanging family photos or artwork on the walls can help create a sense of connection and nostalgia in your new home. Seeing familiar faces and memories on the walls connects you to your space, even if it’s still unfamiliar.

You can add shelving or storage units to the walls, which can help you make the most of your space and keep your belongings organized. If you’re working from home, hanging a whiteboard or corkboard on the wall can also be a helpful tool for staying organized and focused.

4. Spruce up the lighting 

The proper lighting can set the mood, enhance the ambiance, and create a sense of warmth and coziness in your new living space. Suppose you want to create a cozy, intimate atmosphere in your living room. In that case, you can use a few table or floor lamps to create a soft and warm glow, making the space feel more inviting and the perfect place to unwind after a long day. 

Another important consideration when it comes to lighting is natural light. Maximizing natural light in your home can have numerous benefits, from boosting your mood and energy levels to helping you feel more connected to the outdoors. Studies also link natural light with higher productivity levels, better sleep, and more vitamin D storage in your body.

5. Use indoor plants for freshness 

Table surrounded with chairs, sunflowers in a vase and big doors leading to yard
Used with permission Breeze Giannasio

Incorporating plants into your new living space can help create a sense of calm and relaxation, improve air quality, and even boost your mood. Place a few potted plants in your living room to create a natural and calming atmosphere, and you will feel more at ease in your new surroundings. Indoor plants can also positively impact your mental and emotional health. Research has shown that being around plants can reduce stress, boost creativity, and improve focus and concentration.

When choosing plants for your new home, it’s essential to consider factors like lighting, temperature, and humidity levels to ensure they thrive in their new environment. Some plants, like succulents or snake plants, are low-maintenance and can tolerate various conditions. In contrast, others may require more specific care.

Conclusion 

A few simple touches can transform your cold new space into a warm home that puts you at ease. Whether you’re settling into a new apartment, house, or condo, taking the time to make your new home feel comfortable can go a long way in helping you adjust to your new surroundings and feel acclimated to your new community. Start fresh, embrace your moving experience, explore new ideas, and create a better environment for you and your loved ones.

Thanks to ssrelocation.com for consulting on this post.

Hardwood Floor Resurfacing vs Refinishing

Hardwood flooring is a popular choice for homeowners who want an elegant and timeless look in their homes. It adds warmth and beauty to any room, making it a great investment for your home. There are many types of hardwood flooring available, each with its own unique characteristics and benefits. Solid hardwood is milled from one piece of wood, giving it stability and durability. Engineered wood is made up of several layers of wood bonded together for added strength. Exotic woods such as bamboo or Brazilian cherry offer an exotic look that can add character to any room. No matter which type you choose, hardwood flooring in Victoria offers timeless beauty and value to your home.

Difference Between Resurfacing vs Refinishing

Bright designed living room with wall decoration
Photo by Vecislavas Popa from Pexels

Hardwood floor resurfacing and refinishing are two popular ways to restore a hardwood floor’s original beauty. However, there is an important difference between the two. Resurfacing involves sanding the top layer of wood and then applying a new finish. This process can give your hardwood floors a like-new appearance. Refinishing, on the other hand, involves sanding down all layers of wood to reveal the natural grain beneath. This process can also restore the sheen of worn floors to their original condition and bring out their unique character. Both processes are labour-intensive and time-consuming, but if done properly will increase the value of your home for years to come.

Resurfacing Hardwood Floors

Resurfacing hardwood floors is an effective way to restore the original beauty of a wood floor. It involves sanding down the top layer of wood, removing scratches and imperfections, and then applying a new finish. This process can make your floor look like new again, while still maintaining its unique character. Resurfacing can be done by hand using sandpaper or with specialized machines that are available for rent or purchase. The cost will depend on the size of your room and the type of finish you choose. Once completed, your floor will be restored to its former glory and have increased value to your home.

Average Cost and Time Frame

The average cost of hardwood floor resurfacing is between $2 to $4 per square foot, depending on the type of finish and size of the room. The time frame for the project can range from a few hours to a couple of days. It is important to note that this process requires skill and experience so it is recommended to hire a professional contractor who specializes in hardwood floor refinishing. A professional will be able to assess the condition of your floors and determine what kind of finish would best suit them. They will also have access to the specialized equipment needed for the job such as sanders, buffers, and polyurethane sealants. The cost may be higher but it will ensure that your floors are refinished with quality results that last for years.

Pros and Cons of Resurfacing Floors

Living room with chair, couch with blue pillows and round chandelier
Used with permission of Colleen Duffley

Hardwood floor resurfacing is a great option for homeowners who want to update their floors without the full expense of refinishing. It involves sanding down the existing finish and applying a new coat of polyurethane or another sealant. The main pro of resurfacing is that it can cost less than refinishing, as well as being faster and easier to complete. However, there are also some cons associated with this process. Resurfacing will not get rid of any deep scratches or dents in the wood, so if your floor has these issues then you may need to opt for refinishing instead. Resurfacing also does not provide as much protection from wear and tear or spills as a full refinish does, meaning that your floors may require more frequent maintenance. Finally, if the existing finish on your floors has been chemically stained or treated it cannot be removed by resurfacing, meaning that you would have to opt for a full refinish anyway.

Refinishing Hardwood Floors

Refinishing hardwood floors is a great way to bring back the warmth and beauty of your home. This process involves sanding down the existing finish, repairing any damaged areas, and then applying a new coat of polyurethane or another sealant. Refinishing provides much more protection from wear and tear or spills than resurfacing alone, so it may require less frequent maintenance in the long run. It also can get rid of deep scratches or dents on the wood, restoring it to its original condition. The main downside of refinishing is that it can be expensive, as well as time-consuming depending on the size of the room being refinished. However, if you are looking for a long-term solution that will protect your floor for years to come then refinishing is definitely worth considering.

Average Cost and Time Frame

When it comes to the average cost and time frame of refinishing hardwood floors, the price range can vary widely depending on the size of your project. Generally speaking, a basic refinishing job can cost anywhere from $2 to $4 per square foot, while a more complex job could be closer to $6 per square foot. In terms of time frame, it typically takes around three days for a professional to complete the entire process from start to finish. This includes sanding down the existing finish and repairing any damaged areas, as well as applying multiple coats of sealant and finish. Be sure to ask your contractor for an estimate based on the size and complexity of your project before getting started.

Pros and Cons of Refinishing Floors

Cabinet in the living room and paintings on the wall above
Photo by Spacejoy on Unsplash

Refinishing hardwood floors can be an effective way to restore their beauty and add value to a home. However, it’s important to weigh the pros and cons of refinishing before making a decision. On the plus side, refinishing is often less expensive than replacing the flooring altogether. It also allows you to customize the finish and colour of your floors, giving them a completely new look. Additionally, it’s an environmentally friendly alternative as no new materials are required.

On the downside, it can be time-consuming and labour-intensive. Furthermore, refinishing is not always suitable for every type of wood or pre-existing condition; in some cases, replacement may be more appropriate. While refinishing is a great way to give your hardwood floors a fresh start, make sure to consider all options before deciding on which route to take.

Types of Sanders Used in Refinishing Process

The sanding floor is an integral part of the refinishing process. While there are a variety of sanders available on the market, each with its own advantages and disadvantages, understanding which one to use for your project can be tricky. But by knowing what type of job you’re undertaking and choosing the right sander for the task, you can ensure that your floors will look their best.

Drum sanders are ideal for large floor spaces as they cover a wide area quickly and efficiently. They also produce a smooth finish when used correctly. Orbital sanders are more suitable for smaller areas as they have more control over their movements while still providing an even surface.

Edge sanders are great for getting into tight corners and along walls that larger machines may not be able to reach. Finally, hand scrapers are ideal for detailed work such as removing paint or varnish from corners and edges without damaging the surrounding woodwork. With the right sander in hand, you can make sure that your hardwood floors look beautiful after refinishing them.

Conclusion

Hardwood floor resurfacing and refinishing are both great ways to repair, restore, and maintain your hardwood floors. Depending on the condition of your floors, one may be better suited for you than the other. Resurfacing is ideal for fixing scratches and water damage while refinishing is best when dealing with aged wood planks or excess stains. No matter which process you choose, you’ll be able to bring back the beauty of your hardwood floors in no time. With the right tools and knowledge on how to properly fix each issue, your hardwood floors will look as good as new!

Thanks to 1dayrefinishing.com for consulting.

11 Essential Tools Every Homeowner Needs for Repairs

Hey there, my friend! Are you a proud homeowner, but sometimes feel a bit lost when it comes to fixing things around the house? Don’t worry, we’ve all been there!

Let me tell you, homeownership can be a thing of joy and adventure, but it also comes with a few responsibilities. When things break down (and let’s face it, they always do), it can be a real bummer when you don’t have the right tools to get the job done.

Wall with images in living room
Used with permission of Melanie Gowen

That’s where a trusty toolbox comes in! From hammers to screwdrivers, having a good set of basic tools is essential for any repair job, big or small. Whether you’re dealing with a leaky faucet, a squeaky door, or just need to hang up a picture frame, having the right tools can save you time, money, and a whole lot of frustration.

Now, I know what you’re thinking: “But Decorology, there are so many tools out there! How do I know which ones to get?” Well, my friend, fear not! We’ve put together a list of the 11 must-have tools every homeowner should have in their arsenal. Trust me, you won’t want to miss this one!

So go ahead, grab a cold drink and get ready to become a DIY master. With these essential tools and tips by your side, you’ll be fixing up your home like a pro in no time!

Screwdriver Set

A good screwdriver set is a must-have for any homeowner. From tightening loose screws to assembling furniture, a screwdriver set will come in handy time and time again. 

Look for a set that includes both flathead and Phillips head screwdrivers in various sizes to ensure you have the right tool for the job. 

And if you’re feeling fancy, consider investing in a set with interchangeable bits for even more versatility.

Claw Hammer

Next up on our list is the claw hammer. This versatile tool can be used for everything from hanging up pictures to removing nails. 

Look for a hammer with a comfortable grip and a sturdy claw for easy nail removal. And if you’re feeling extra handy, consider getting a framing hammer for heavier duty tasks like building a deck or framing a wall.

Adjustable Wrench

An adjustable wrench is another essential tool for homeowners. This versatile tool can be used to tighten or loosen bolts, nuts, and fittings of various sizes. 

Look for a wrench with a comfortable grip and a wide jaw capacity to ensure you can handle a variety of tasks. And if you’re feeling fancy, consider investing in a set of adjustable pliers for even more versatility.

Level

Home office shelf
Used with permission of Kerry Spears, Nathan Schroeder and Kelli Boyd Photography

If you’ve ever hung up a crooked picture frame or installed a wobbly shelf, you know the importance of a good level. 

A level will help ensure that your projects are straight and level, giving your home a professional look. Look for a level with both horizontal and vertical bubbles for added precision.

Tape Measure

From measuring furniture to hanging curtains, a tape measure will come in handy occasionally. Look for a tape measure with a sturdy locking mechanism and a clear, easy-to-read scale. And if you’re feeling extra fancy, consider investing in a laser measuring tool for even more precision.

Power Drill

While a screwdriver set is great for basic tasks, a power drill can make your DIY projects a breeze. With a power drill, you can quickly and easily drill holes, drive screws, and even mix paint. Look for a cordless drill with a comfortable grip and multiple speed settings to handle a variety of tasks.

Saw

Whether you’re cutting through lumber or trimming a piece of molding, a saw is an essential tool for any homeowner. Look for a handsaw with a sharp blade and comfortable grip for easy use. 

And if you’re planning on tackling larger projects like building a deck or a treehouse, consider investing in a circular saw or a jigsaw for even more versatility.

Pliers

Pliers are another versatile tool that every homeowner should have on hand. They can be used for gripping, bending, and cutting wires, as well as tightening nuts and bolts. Look for a set of pliers with a comfortable grip and multiple jaw sizes to handle a variety of tasks.

Utility Knife

Beige bedroom with king bed and long chair in front of the bed
Used with permission of Breeze Giannasio

A utility knife is a handy tool for a variety of tasks around the house, from opening boxes to trimming carpet. Look for a utility knife with a retractable blade and a comfortable grip for easy use. 

And if you’re feeling fancy, consider investing in a set of replacement blades to ensure your knife is always sharp.

Stud Finder

When it comes to hanging shelves, mirrors, or other heavy items, finding the studs in your walls is essential. 

A stud finder can help you locate the studs so you can hang your items securely. Look for a stud finder with a clear display and a variety of scanning modes to ensure accuracy.

Allen Wrench Set

An Allen wrench, also known as a hex key, is a small tool that is used to tighten or loosen screws with hexagonal sockets. 

These types of screws are commonly found on furniture, bicycles, and other household items. Look for a set of Allen wrenches in various sizes to ensure you have the right tool for the job.

Budgeting for Your Home Repairs

Corner of the room as home office
Used with permission of Alice Lane

Now that you know the essential tools you need for home repairs, it’s important to also consider how to budget for these repairs. Home repairs can be expensive, but with a little planning and strategy, you can ensure that you have the funds you need when you need them.

To make sure you have the necessary funds when you need them, start by prioritizing your repairs, determine the cost of each repair and then create a savings plan. You can either set up a separate savings account dedicated to home repairs, or set aside a portion of your paycheck for future repairs.

Alternatively, you can consider a service contract, such as a home protection plan or “home warranty.” This type of plan, as explained by Cinch Home Services (https://www.cinchhomeservices.com/home-warranty), can help you avoid costly and unexpected repair bills and simplify the process of repairing or replacing some specific home systems and appliances.

Wrapping Up

As a homeowner, having the right tools on hand can make all the difference when it comes to tackling repairs and DIY projects around your home. With these tools mentioned here at your disposal, you’ll be able to take on any project with confidence and ease.

Thanks to cinchhomeservices.com for consulting.

10 Easy Home Repairs You Can Do by Yourself

Even though certain house repairs might require a trained specialist’s assistance, homeowners can complete plenty of straightforward fixes on their own with the help of some essential tools and some basic knowledge. The following is a list of some of the most common kinds of home repairs that the homeowner can do: 

1. Painting 

Living room with arm chairs, coffee table, TV and wide windows with curtains
Used with permission of Blackband Design

Painting is one of the most straightforward house improvements homeowners can tackle independently. It only requires some paint, brushes, and rollers to get the job done. However, before commencing any painting endeavor, it is essential to completely clean the walls and repair any cracks or holes that may be present. Then, before moving on to the next coat of paint, ensure the previous one has had adequate time to dry thoroughly. 

2. Plumbing 

Homeowners can perform basic plumbing repairs independently, such as repairing a dripping faucet or clearing a clogged drain. For example, turning off the water supply to the faucet and removing the handle and valve stem are the first steps in fixing a leaking faucet. However, if the obstruction is severe, you may want the assistance of a plumber with the right skills and expertise to effectively diagnose and solve the problem. 

3. Electrical 

Homeowners can make basic electrical repairs, such as replacing a light switch or an outlet. However, before beginning any work on the electrical system, it is essential to ensure that the power supply has been cut off to the region:

  1. Turn off the power, then remove the cover plate from the light switch you want to replace.
  2. Remove the screw that secures the switch, then unhook the wires. After you have screwed the replacement switch back into place, connect the cables to it. Turning off the electricity and removing the cover plate are the first steps in replacing an outlet.
  3. Remove the screw that secures the outlet and detach the wires.

After reconnecting the cables to the new outlet, reinsert the screws to attach them. 

Electrical work carries the risk of severe injury or even death if not performed appropriately. Therefore, working with a qualified electrician with a valid license is imperative when making extensive electrical repairs or installations. 

4. Flooring 

Living room with sofas, armchairs, table and flat TV on the wall
Used with permission of Blackband Design

Carpet, tile, or hardwood can be replaced with new flooring if the homeowner chooses. It is essential to clear away the debris left by the previous flooring and get the subfloor ready before beginning any project involving flooring. Before installing, make sure to follow the directions provided by the manufacturer. 

Suppose you need a deck repair. In that case, you can investigate the underlying problems leading to the damage and find solutions. Unfortunately, removing any existing coating materials is usually required for most deck leak repairs. As a result, it is strongly suggested to employ the services of a trustworthy professional service organization. 

5. Drywall 

The homeowner can repair little holes or cracks in the drywall. To get started, clean the region adjacent to the hole or crack. After cutting a piece of drywall to size just slightly larger than the hole or crack, drywall tape should be used to fix it. On top of the tape, apply the joint compound and then wait for it to dry. Next, sand the surface until it is smooth, and then, if necessary, add a second coat of joint compound. 

6. Roofing 

Front yard and houses
Used with permission of Patterson Custom Homes, Architect: Brandon Architects

Homeowners can do some basic roofing repairs, such as replacing a shingle that has been damaged. However, remember that getting up on a roof can be risky and that repairing or replacing a roof requires expert knowledge and appropriate equipment. A qualified professional roofer possesses the knowledge and experience necessary to address any problems with your roof in a manner that is both secure and efficient. 

7. HVAC 

Homeowners can undertake some fundamental upkeep on their heating, ventilation, and air conditioning systems, such as changing the air filter. Read the instructions provided by the manufacturer to determine the frequency of advised filter replacements. Get a professional HVAC specialist to diagnose and correct any problems with your system if you find it an arduous chore.  

8. Windows and doors

Window and door repairs and replacements are options for homeowners. You must first remove the shattered glass and old sash to repair a window. Next, prepare a new piece of glass by cutting it, and then use a glazing compound to hold it in place. 

9. Gutters 

These can be cleaned and repaired by homeowners. To clean gutters, remove any debris present and use a hose to rinse. While fixing gutters, you should replace broken portions with new ones and check to ensure they are correctly fastened. 

10. Garden area 

Wild garden and a white house in the background
Photo by Chaewon Lee on Unsplash

Ensure you have a solid plan for reviving your garden. It will assist you in preventing overcrowding and will guarantee that your plants have sufficient room to develop and flourish. Also, you need to consider the amount of sunlight and water each of your plants will require and select the proper plants based on this information. Finally, mulching your plants is an easy task and an efficient approach to caring for your garden.

Thanks to allclimateroofing.com for consulting.

Understanding PVA Manufacturers

used with permission from AKG Design Studio. photos by @RyanGarvin

PVA, also known as polyvinyl alcohol, is a synthetic plastic that is colorless and odorless. It is water-soluble and often sold as granules or pellets.

It is used to make paper and for packaging products. It improves the absorption of water-based inks on paper and helps to hold colored dyes better. It is also a reliable alternative to starch for bonding multi-ply paper boards.

PVA manufacturers produce the polyvinyl alcohol (PVA) used in various industries, including packaging. They offer a wide range of grades, which allows customers to choose the most appropriate product for the specific application.

Aside from its uses in the food and beverage industry, PVA has important pharmacological properties that make it an excellent choice for use in ophthalmic formulations. It is a synthetic, biocompatible, and toxicologically well-characterized polymer that can be easily tailored to meet individual requirements in formulation development.

One of the most important things to consider when selecting a PVA is its compatibility with the API and other excipients used in ophthalmic formulations.

A PVA’s hydrolysis grade, which refers to the amount of residual, unhydrolyzed acetate groups within the polymer chain, is also essential for drug delivery. Higher hydrolysis grades enhance API solubility and can improve gel-forming capabilities, while lower hydrolysis grades may be better suited for poorly water-soluble APIs.

used with permission from AKG Design Studio. photos by @RyanGarvin

Packaging

Packaging is a broad term used to describe the layers that hold or protect a product. It can include paper, plastic, or other materials that make it easier to handle and transport.

PVA is often used for primary packaging, as a sachet or pouch that holds a liquid, especially one that dissolves in water. However, it also can be used in tablet capsules for medicine.

The critical property of PVA bags is that they can dissolve in water in minutes. It is due to a particular property known as the ‘degree of hydrolysis,’ which determines how water-soluble the polymer is at different temperatures.

In addition, PVA is also a great alternative to LDPE plastic bags for groceries and other items that don’t need to be rinsed. As a result, it can help reduce the amount of plastic in landfills.

used with permission from AKG Design Studio. photos by @RyanGarvin

Cosmetics

Cosmetics are a wide range of products that alter and improve the appearance of the skin, lips, eyebrows, and eyes. They include skin care products, hair care products, makeup, and perfumes.

Many people use cosmetics every day. Therefore, it is essential to understand how cosmetics are made and what ingredients go into them.

PVA is an adhesive, emulsifying, and film-forming agent commonly used in shampoos, cosmetics, facial masks, sunscreens, and mascara. It also has high tensile strength and is resistant to grease, oil, and solvent.

Although PVA is a common ingredient in many beauty products, it can be unclear how it’s manufactured. Hydrolysis usually makes it, where polyvinyl acetate is dissolved and replaced with water.

used with permission from AKG Design Studio. photos by @RyanGarvin

Household Cleaning

Regarding household cleaning, PVA is a critical ingredient that helps create safe products for people and the environment. That’s because it’s water-soluble and designed to biodegrade.

To make PVA, laboratory and industrial chemists produce nature-identical ethylene, which is then turned into vinyl acetate through a chemical reaction with oxygen and acetic acid (in a diluted form known as vinegar). After the polymerization process, it’s dissolved in alcohol to become a water-soluble polymer or polyvinyl alcohol.

PVA is used in various products, including laundry pods and dishwasher detergent tablets. It’s also popular in baby wipes, diapers, and contact lens solutions. It can also help strengthen textile yarns, improve color cohesion, and make the paper more grease and oil resistant.

The Only Checklist You’ll Need to Help Your Moving Process

Moving can be stressful and time-consuming. When it’s your first time moving homes, you may not know where to begin. If the list of tasks seems endless to you, you’re not alone. 

Moving can be stressful, whether you’re moving to a different city or a simply to a different state, for example, Houston, Texas. According to estimates, an average of 257 people move to Houston, Texas, everyday, which means that the state has excellent moving services. Making use of moving services can make the process much easier. This will allow you to complete your checklist in a straightforward and comprehensive way by the time moving day arrives.

Here’s a checklist of tasks to get you started and prepare for moving day efficiently. 

1. Set a Budget

First and foremost, you’ll need to set a budget for your moving process. Since moving prices can vary based on different states, doing location-specific research beforehand can be useful.

You can start by getting personalized quotes from three moving companies to determine which one is the most within your budget. You can also compare amenities such as 24/7 availability or licensed tradesmen. 

It would be best to hire movers to make sure the process is streamlined and hassle-free. Make sure to include that in your budget. To do so, you need to look into resources in your area. For example, if you’re moving to Houston, Texas, resources like https://www.colemanallied.com/areas-served/houston-tx/long-distance-movers/ may be of help.

2. Declutter

Decluttering your belongings before moving will allow you to simplify the packing experience and save money on moving vehicles. You won’t regret looking through your belongings once and getting rid of or selling things you won’t be using in the future. Try to donate them to a local shelter or charity. 

Additionally, it’s best not to leave fragile, sensitive, or expensive items in the moving truck. That may include safes, fine art, or any weapons you need to separate from the rest of your belongings.

3. Collect Supplies

View of the fireplace and living room from kitchen
Used with permission of Andrea West Design

Collecting and investing in packing supplies is a crucial step. You’ll need a large collection of cardboard boxes to store your belongings. If you’re on a budget, you may consult the neighborhood society to recycle used containers and boxes.

Other than that, you may contact local businesses like office supply stores, grocery stores, liquor stores, and restaurants, as they may have free boxes to spare. You may also go for used cardboard boxes for an eco-friendly alternative.

4. Utilize Packing Hacks

Shoving all your belongings in cardboard boxes may save more time, but it’s not efficient. Luckily, there are various packing hacks available online that’ll allow you to pack in the savviest possible way. You can do quick online research for packing hacks before you begin the process.

For example, labeling your boxes is a great hack to save time and effort when it’s time to unpack at the new house. You may also color code the boxes based on their destination or fragility. If a box contains fragile items, include instructions for the moving company to handle it with care.

5. Create an Inventory

Hallway with table with drawers and decoration on it
Used with permission of Blackband Design

It may seem like a time-consuming step, but listing your belongings in an inventory is the best way to stay sane and safe during the moving process. This will allow you to ensure you pack all your belongings if an item goes missing by the time you arrive at the new house, so you can contact the moving company for details. It’s also best to write down what box each item belongs to, making it easier to unpack.

You can also take this opportunity to take pictures of how all your electronics are wired together. This is a great hack for the ones who don’t have a tech-savvy loved one to help them set up their electronics in the new home.

6. Disassemble the Furniture

Finally, once you’re a few days from moving day, you can begin disassembling your furniture. Make sure to place all screws and small hardware in plastic bags along with their respective furniture to eliminate guesswork while assembling them again. It may also be helpful to record the disassembling process so that re-assembling is simpler.

Other than that, measure your furniture beforehand to ensure it will fit through the door of your new home. This will also give you enough time to determine efficient ways to carry the furniture to its destination without damaging it.

7. Tie Up Loose Ends

If you’re moving out of town, this is a great time to tie up loose ends. That includes canceling all local memberships and subscriptions, such as gyms, magazines, societies, etc. You can also use this opportunity to say goodbye to your friends around town.

We also recommend using this time to gather all your records in one place, whether financial, legal, or medical. You may need to gather these from local institutions such as your school or college.

8. Find New Providers

House garden with a storage
Used with permission of Patterson Custom Homes, Architect: Brandon Architects

Before you arrive at your new house, it’s crucial to find a new internet provider as Wi-Fi will be required in the moving process. Other than that, you’ll need to get in contact with other new providers, such as a new dentist or doctor.

This way, you’ll have somewhere to go in case of an emergency during the move. If you have pets, find a vet in the area before taking your pets to the new home. Don’t forget to bring your pet’s vet records.

9. Last-Minute Tasks

The last day before moving is the time to finish up all last-minute tasks. For example, if you have leftover food, you may get rid of it or donate it. Take this opportunity to clean the rest of your old home too. 

Other than that, you’ll need to unplug the fridge to give it some time to defrost. If you were renting your old place, complete the walkthrough with your landlord to ensure everything is intact. 

Conclusion

When moving homes for the first time, it’s normal to wonder where to start with the endless list of tasks at hand. Everything may seem important, but you can start by creating a priority-based checklist to stay organized. If you don’t want to start the checklist from scratch, use our moving checklist to get the job done quickly yet efficiently.

Thanks to colemanallied.com for consulting.