


via Lonny Mag
via House Beautiful
via Interiors Porn
via FLickr
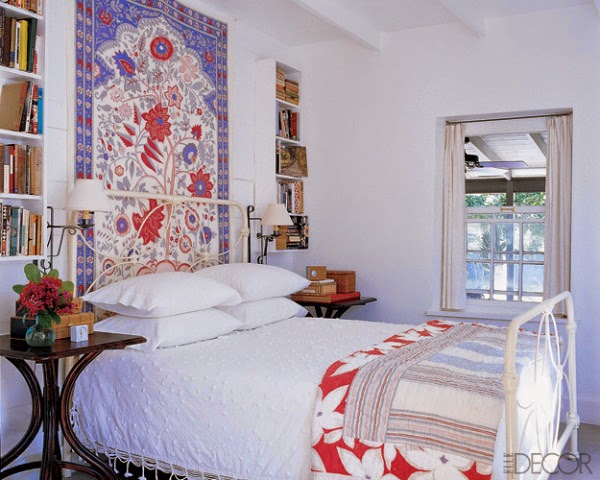
via Elle Decor

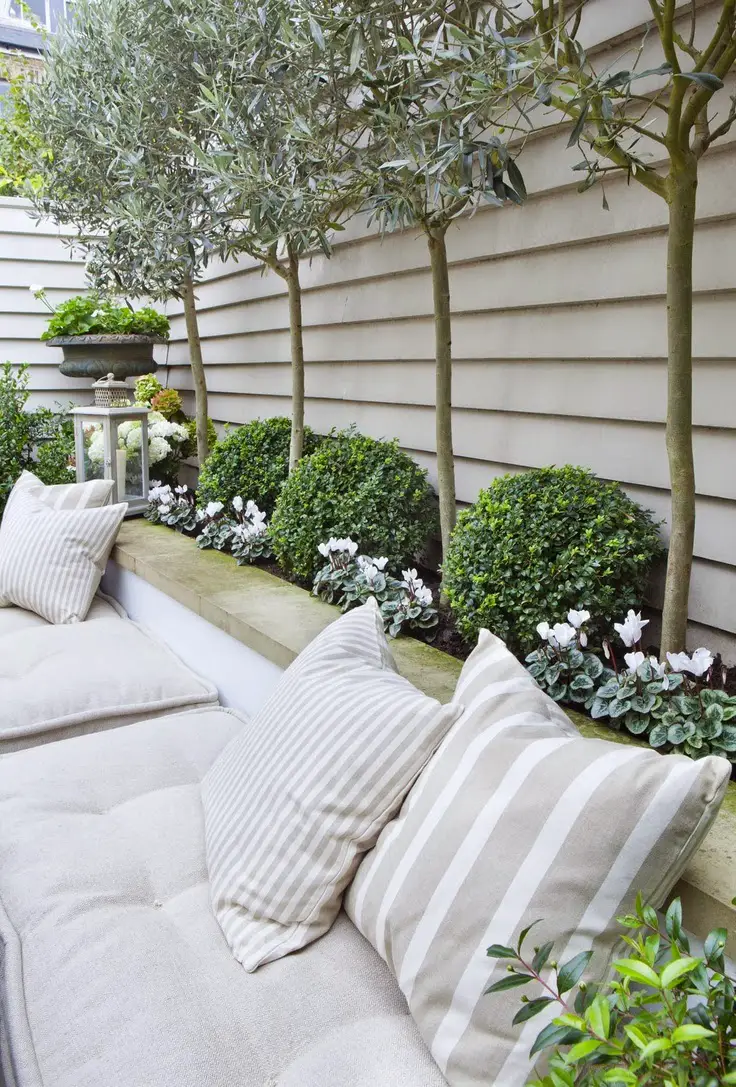
Where we live, it’s not uncommon for the deck to be off the second story and there be an open space or patio with a walk out basement. What to do with that open space can be a struggle for many!
Here are a few ideas to get you inspired to use that extra space instead of wasting it:

With the amount of things that go through my inbox on a daily basis as well as great finds I see while I am out and about, I figured I’d start sharing some of my favorite things with you all!


This post may not be the typical sort of thing I feature, but I was lucky enough to receive two lighting fixtures from Westside Wholesale and wanted to show them off in a meaningful way by showing you step by step out to change out a wall mounted light fixture. The lighting that was installed in our master bath when we moved in was nice, but it just wasn’t our style. So I jumped on the offer two review some fixtures of my choice and went with a classic, sophisticated wall mount – the Kichler 5367CH Bathroom Light.

Pretty.
Let’s begin. Part 1: Removing the current fixture . VERY IMPORTANT – Turn off the light switch that powers the fixture.

The existing fixture

Gather up any tools you think you may need ahead of time

Find the screw or peg that attaches the current fixture to the plate to remove the fixture. Then, unscrew the back plate or begin disconnecting the wires (see below)

If you have to disconnect the wires first, you will notice black wires and white wires. Black first and then white. Untwist the cap connecting the black wires and then untwist them.


Next, untwist the grounding wires

Loosen the grounding screw so you and release the grounding wire.
If you didn’t remove the plate before, do it now. Your old mount should now be completely removed.

Depending on what shape box is installed in your wall already, you may need to pop out some of the “tabs” on the plate. Then, assemble the fixture as it will be on the wall.

FIRST – twist together the white wires and top off with the screw cap.

Second, screw together the black wires and top off with a screw cap. Third, twist together the grounding wires. I made a little video for you but it’s not working very well so I have two screen grabs above for you. It is similar to removing an existing fixture except for the order.

Once you have connected all the wires from the wall box to the new fixture, it’s time to attach the plate of the new fixture to the wall.

Push the wires into the box, and screw on the plate.

Loosen up the ground screw and twist the grounding wire around the screw. Retighten the screw.

Place the new fixture on the plate – lining up the screw holes on the top and bottom of the fixture to the holes in the plate.

Tighten the screws so the fixture holds firm and flush against the wall.

That wasn’t hard was it?

Now we just need to paint – and maybe get some matching lightbulbs…
I hope this has inspired you to take on a little DIY project and swap out any fixtures that need to go!
disclosure: I received the light fixtures as a sample from Westside Wholesale

We all probably know it it the details – the icing – that makes a place feel really special. Unfortunately a lot of details can be costly undertakings for the average homeowner. It was the photo below that got me thinking about different ways you can use crown moulding to fake otherwise expensive architectural elements or details…

Can you believe the window above started off as this…

Learn how at Funky Junk Interiors
via Pinterest via Funky Junk Interiors
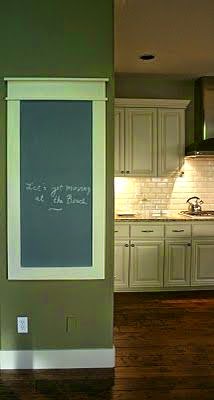
You could make a chalkboard or frame that matches the look of the rest of your home…
via Pinterest

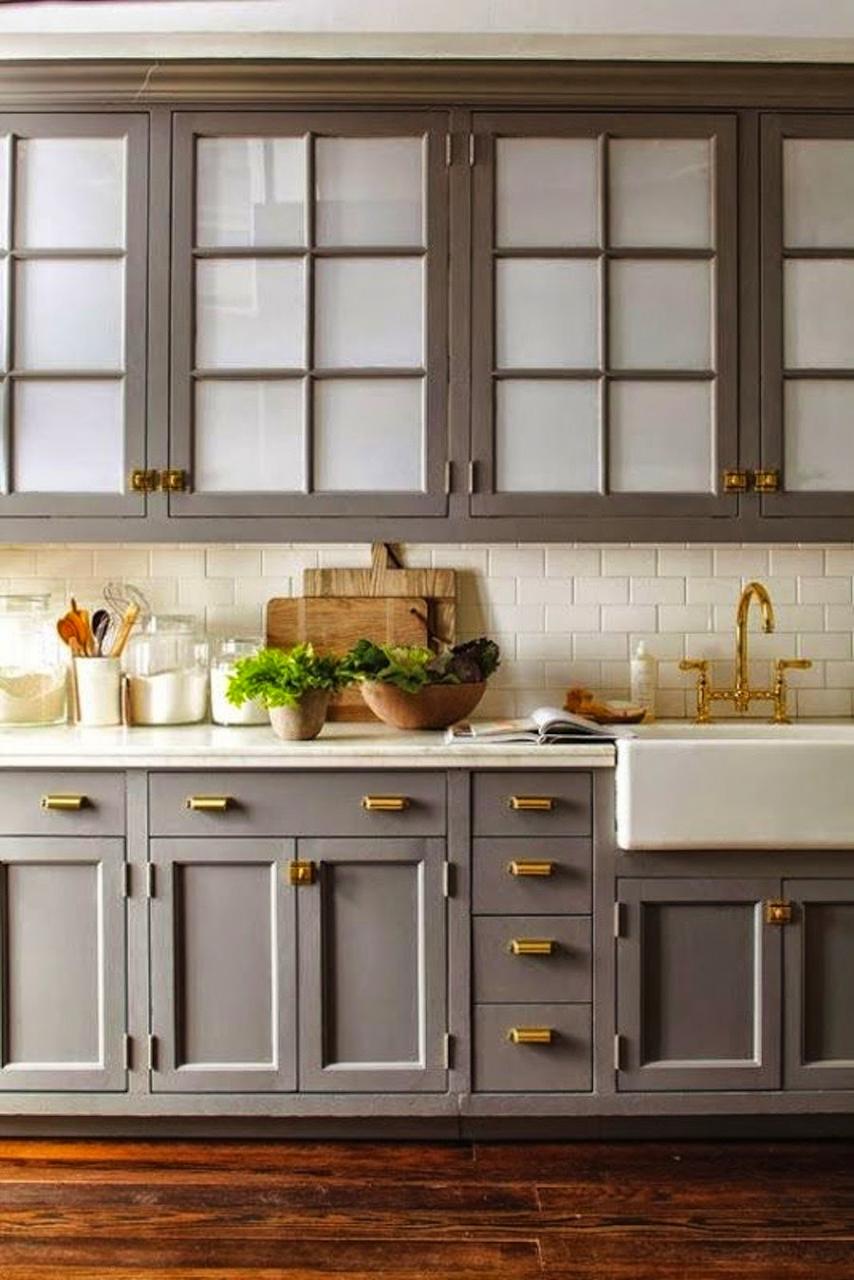
A very thorough DIY on how to fake cabinets that go to the ceiling with moulding. This is probably more involved than most projects but what an impact it makes.
via I Heart Organizing
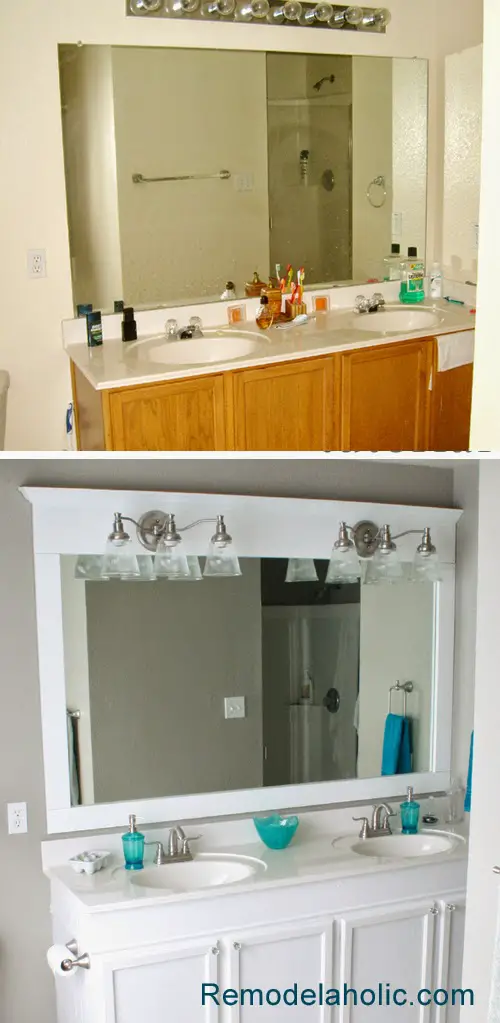
Framing an everyday contractor grade mirror with moulding is easy and looks like a custom piece! Remodelaholic has a great DIY (also the source of this image)
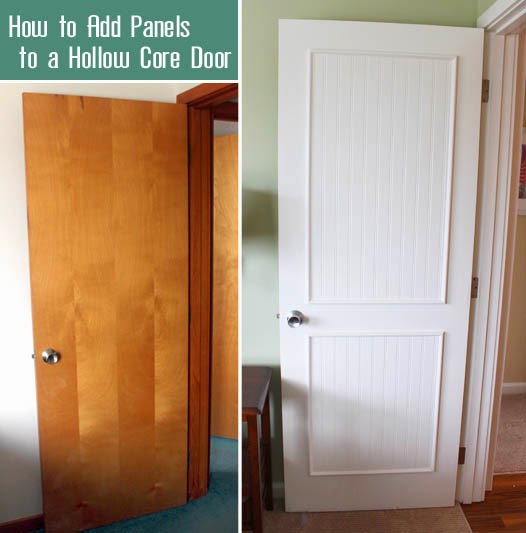
I don’t have hollow core doors like the ones above, mine are the standard white contractor doors, and I’d love to come up with a way to make them look as nice as Pretty Handy Girl did…
via Pretty Handy Girl
Have you ever used moulding in an unconventional way?
We all probably know it it the details – the icing – that makes a place feel really special. Unfortunately a lot of details can be costly undertakings for the average homeowner. It was the photo below that got me thinking about different ways you can use crown moulding to fake otherwise expensive architectural elements or details…
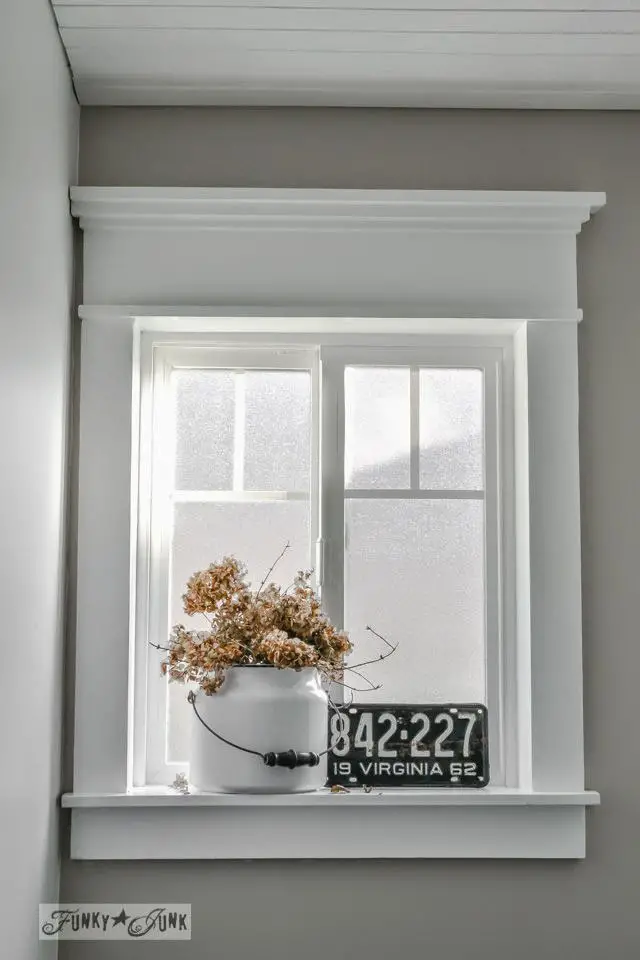
Can you believe the window above started off as this…

Learn how at Funky Junk Interiors
via Pinterest via Funky Junk Interiors

You could make a chalkboard or frame that matches the look of the rest of your home…
via Pinterest

A very thorough DIY on how to fake cabinets that go to the ceiling with moulding. This is probably more involved than most projects but what an impact it makes.
via I Heart Organizing

Framing an everyday contractor grade mirror with moulding is easy and looks like a custom piece! Remodelaholic has a great DIY (also the source of this image)

I don’t have hollow core doors like the ones above, mine are the standard white contractor doors, and I’d love to come up with a way to make them look as nice as Pretty Handy Girl did…
via Pretty Handy Girl
Have you ever used moulding in an unconventional way?

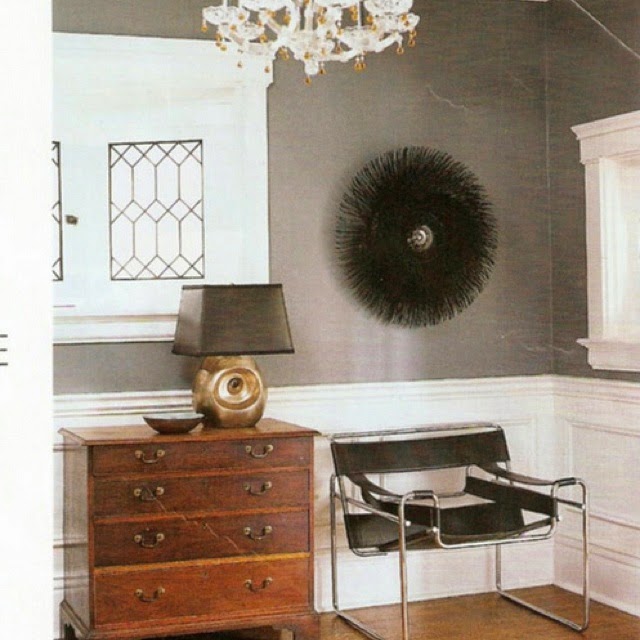
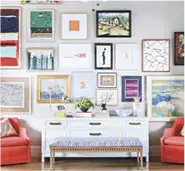
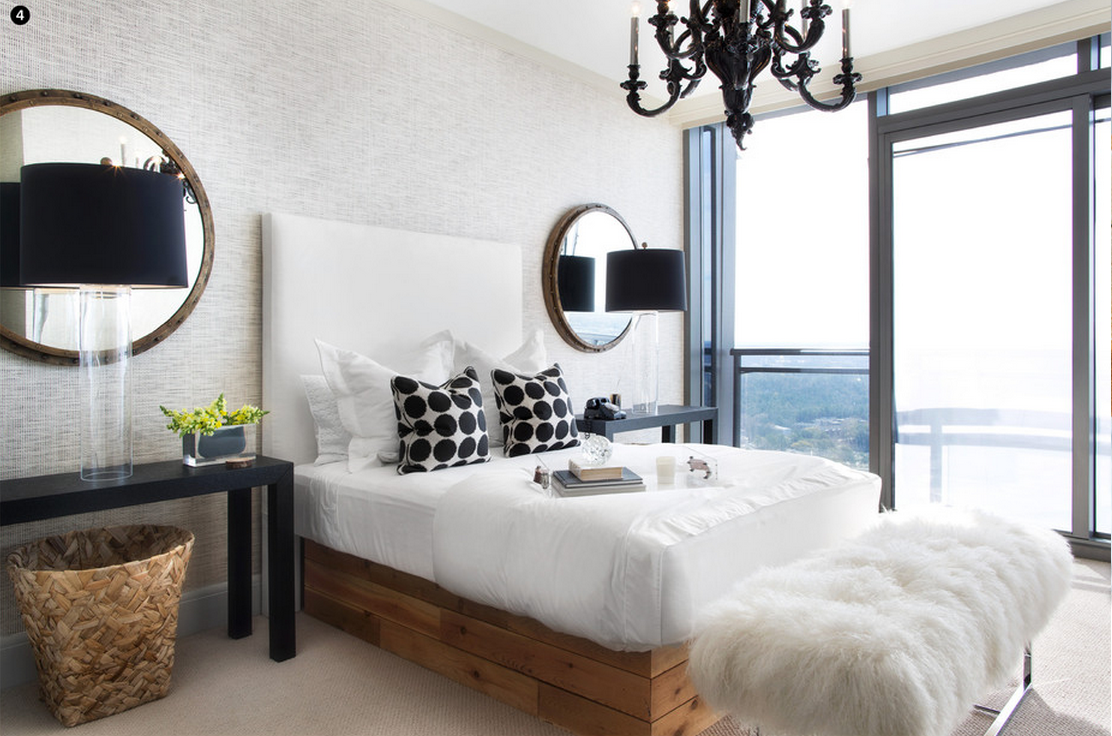
Gorgeous. Notice the modern, crisp lines of the furniture and armchair? The sleek drapery solution? The chrome and glass brought in by the coffee table and the lamp? All of these items counterbalance the dark, heavy feeling of the wood trim. Fill this room with brocades and velvet drapes in burgundy and hunter greens and you have dowdy and dark. Use the above picture as inspiration and you have something really charming and unique.
Above is an example of using stark contrast to make a room feel modern. If you have really dark trim, try using creams (cool creams) and whites in your space and call attention to the trim. I wouldn’t recommend this if you have particularly small rooms, because it’s contrast that has more effect on whether a room feels large or small, not whether you paint it dark or light…IMHO. This all adds up for a really glamorous feel. The glass chandelier adds a modern flair.
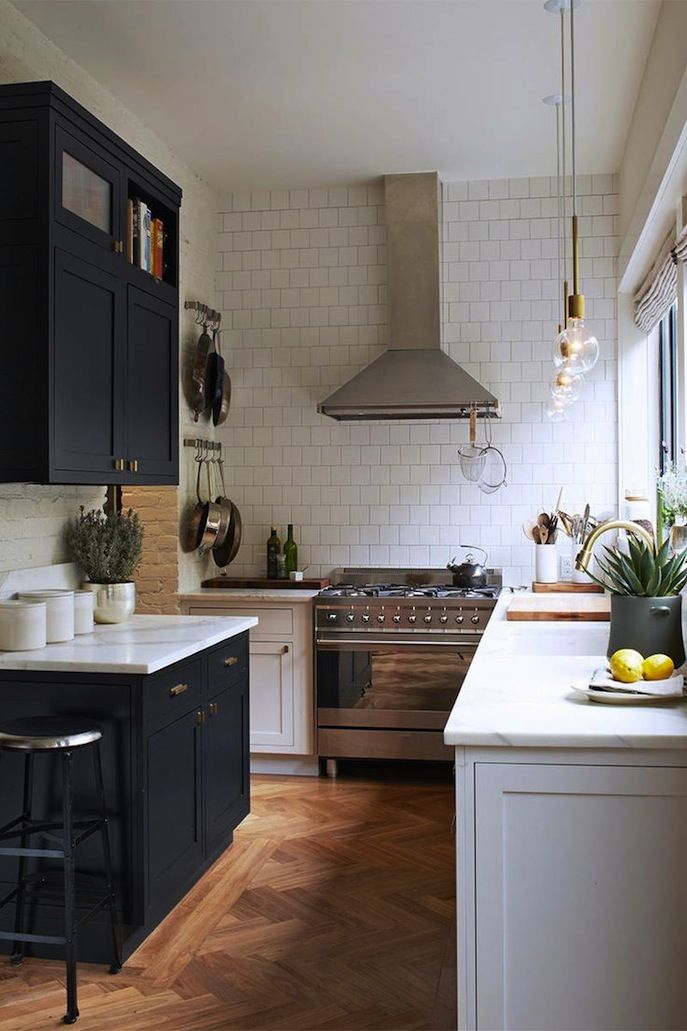
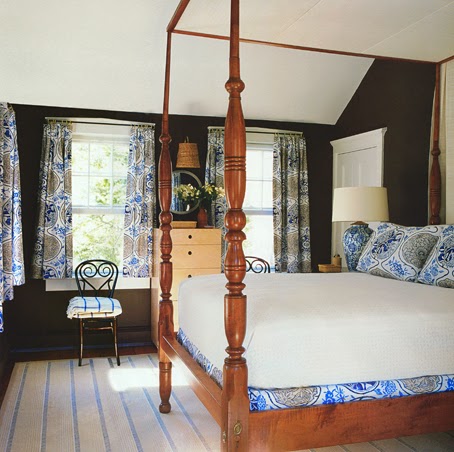
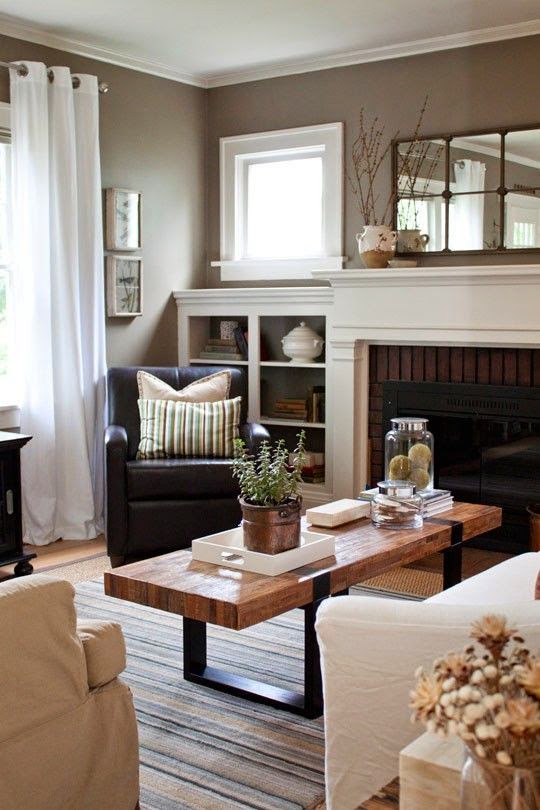
The above is probably my favorite example. It’s another illustration of mixing modern elements, like the sofa and artwork, and paying homage to the original bones of the home – the fireplace surround and the moulding. The navy and honey color of the wood looks super chic.
Below are three other shots of the same home, a Bed Stuy brownstone. I think it’s gorgeous.
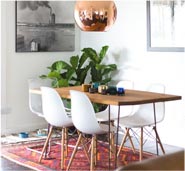
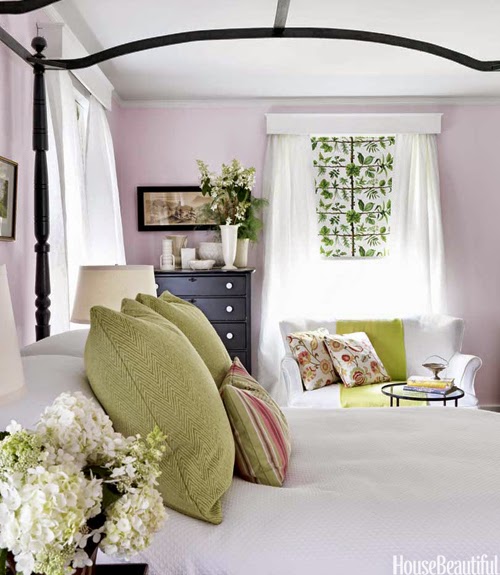
Another option – if you are a bit bolder, is to go for unconventional colors. The bright rug and yellow-green chesterfield add enough funkiness to keep the space modern and not stuffy.

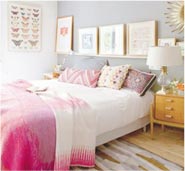
There’s something to be said about the color grey, especially in a home setting. It isn’t too feminine and it isn’t to masculine. You can pair it with almost any color, and it leaves such a crisp clean look to it! I’m a long-time fan, hubby is a little harder to convince. He thinks it’s boring…sigh…
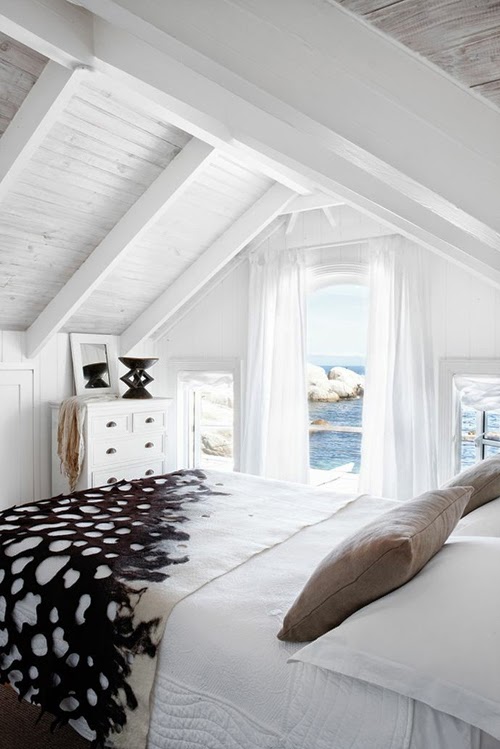
In most cases, it goes great with keeping a room light and bright!
Style Me Pretty

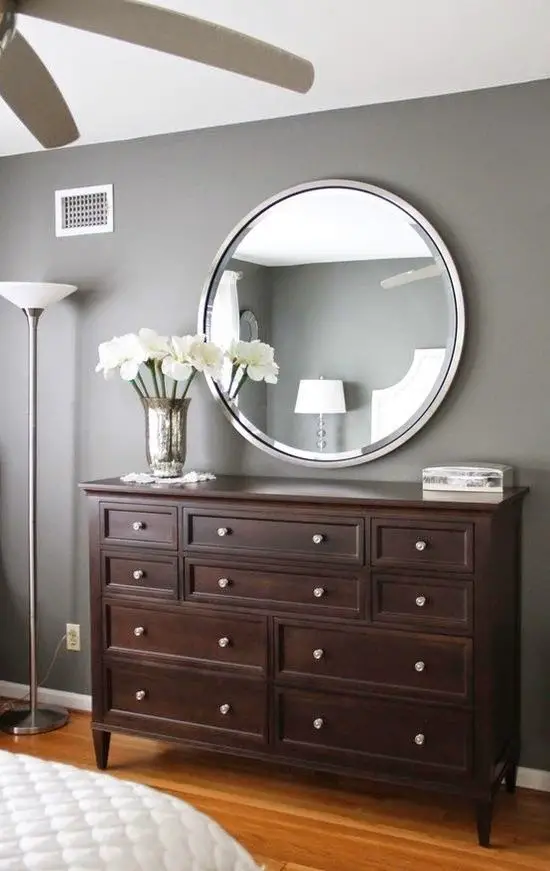
Grey can be very romantic and calming in the bedroom. I can imagine this is a such a soothing environment to fall asleep in.
via Pinterest via Apartment Therapy
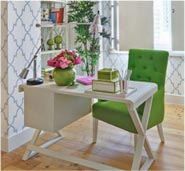
From elegant to cozy, it’s amazing how versatile it can be, so if you are struggling finding that perfect color for your space, you may be surprised at what grey might do for you room!

There are some seriously inspiring bloggers in my blogroll and I wanted to show off some of the great finds that they have been posting about on their sites that I am currently loving!