What Type of Range Hood Should I Buy?

When you are installing new appliances, remodeling, or building a new house, the number of choices available can be daunting. After all the research you have done and decisions you have made, choosing a range hood seems to be unimportant. However, there are a lot of reasons to choose a range hood carefully.

Your range hood provides your kitchen with safe, clean, comfortable air. Gases can be created from burning fuel in your kitchen and removing those gases can be one of the best ways to improve the air quality of your home.

Range hoods can also improve the comfort of your home by removing strong odors, humidity, and grease from the air. Quality appliances like Coppersmith hoods can also cool the kitchen during cooking when heat tends to build up.

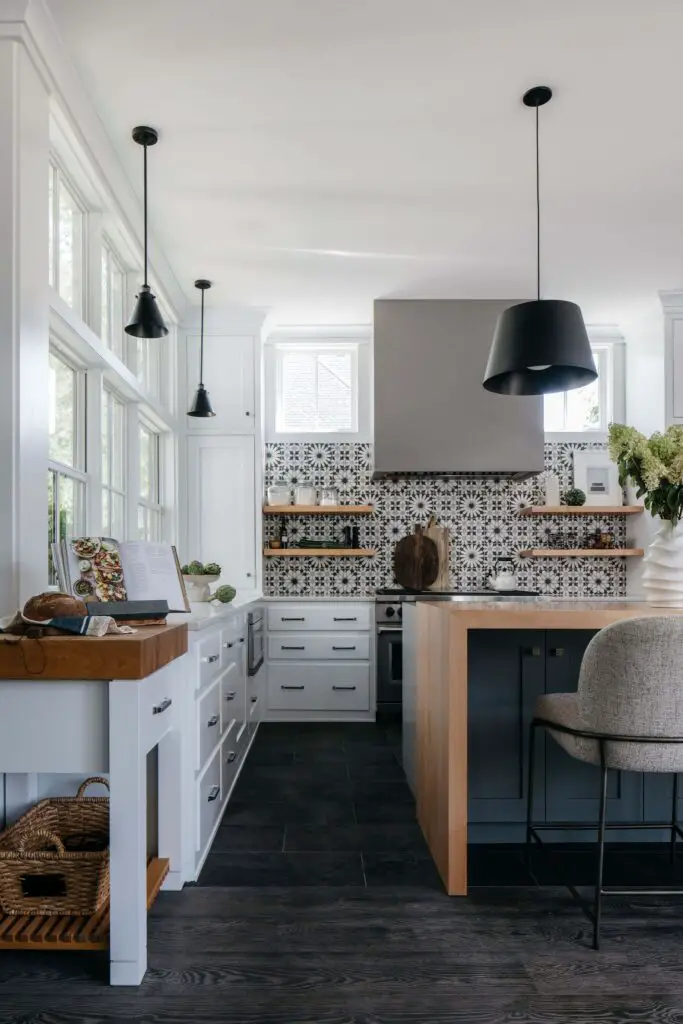
Your range hood is also an important aesthetic part of your kitchen. Some people prefer to have their hoods hidden out of sight and others want to create a vocal point. Some hoods are made of hammered copper, weathered wood, or other decorative materials.

Ducted or Non-Ducted

Regardless of what style of vent hood you choose, you will also need to choose between ducted or non-ducted. Ducted vents pull fumes, gases, and odors from your kitchen and pump them through the wall and outside. Some ducted vent hoods pump air into the attic rather than outside, especially when the range is located too far from an exterior wall.

Ventless range hoods don’t have a system for removing air and gases from the house. Instead, they recirculate the air through filters and then release it back into the kitchen. While this can be helpful in reducing fumes and odors in the room and can pull steam away from the stovetop, it doesn’t remove gases and dangerous elements because those cannot be removed by filtering.

Chimney Range Hood

A chimney range hood has a tall chimney that is exposed to view rather than hidden. The chimney contains the ducts that vent fumes and gases out of the house. These range hoods are eye-catching and more interesting than smaller hoods and can be custom-made. They are the preferred hood in high-end and larger kitchens because they often work better and add a dramatic touch. Chimney range hoods are also easy to vent through the wall or into the attic.
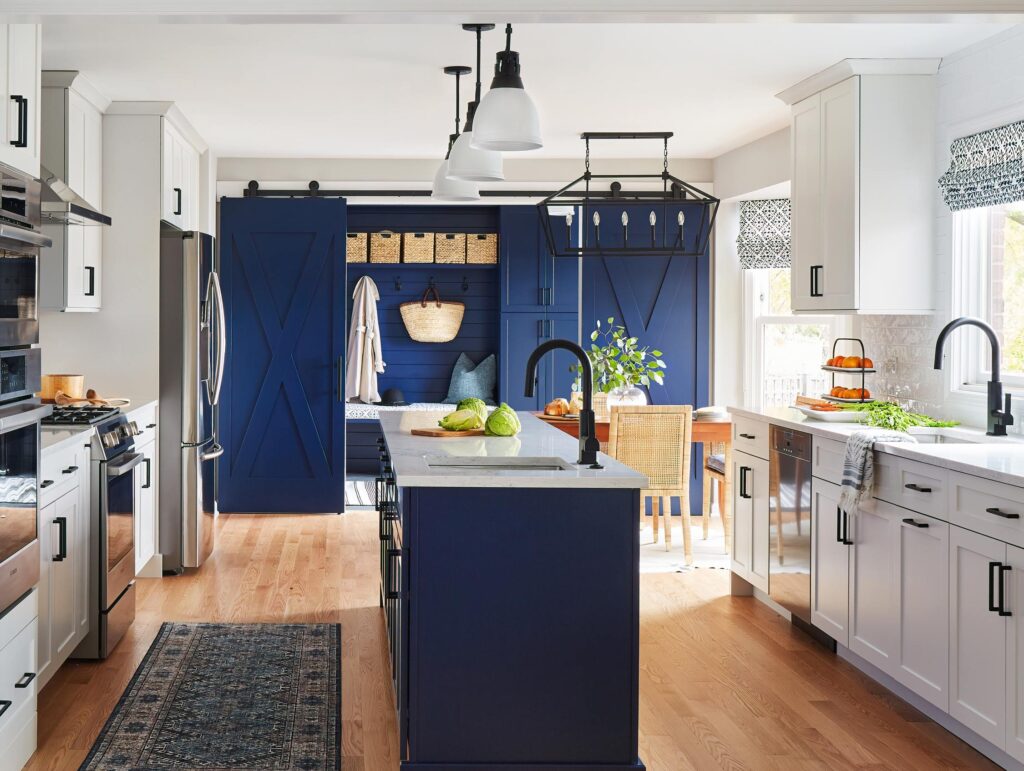
Island Hood

Kitchen with kitchen island table and chairs
Used with permission of Blackband Design

An island hood is a ceiling-mount version of a chimney hood. These dramatic features are used when the range isn’t located against a wall, as in an island or peninsula situation. The hood hangs from the ceiling over the range and vents into the attic or through the attic to the outside. Island hoods come in many styles and can be very dramatic, eye-catching, and sometimes, very expensive. You are choosing a focal point for your room when you select an island range hood.
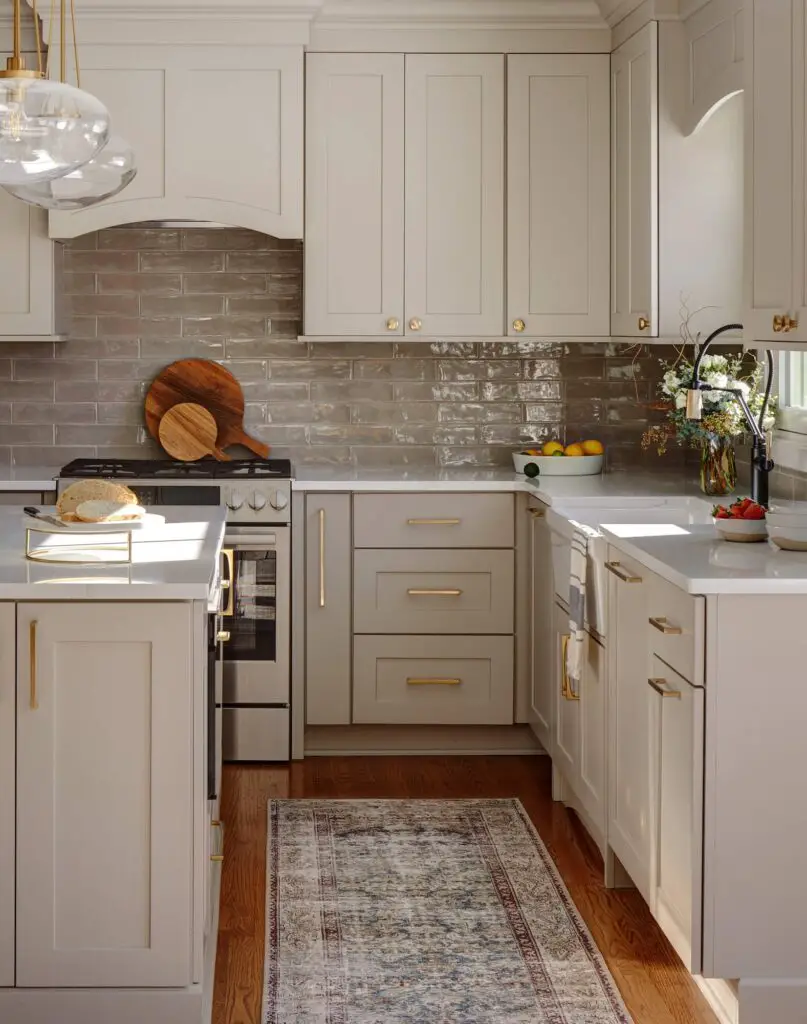
Under-Cabinet Hood

Under cabinet, hoods are wall mounted and designed to sit underneath upper cabinets. These are the cheapest hoods and can be very unobtrusive. They can be vented but if you are adding a hood to a finished kitchen, you will have to install the vent through the wall or cabinet. While it can be a little more expensive and impractical to install, it’s worth the frustration.

Vented hoods are much more effective and the only option that can help remove dangerous gas buildup from burning fuel. Many under-cabinet range hoods are unvented and don’t work well to remove gases from the air. They are more effective at removing grease and scents, but they will never work as well as vented hoods.
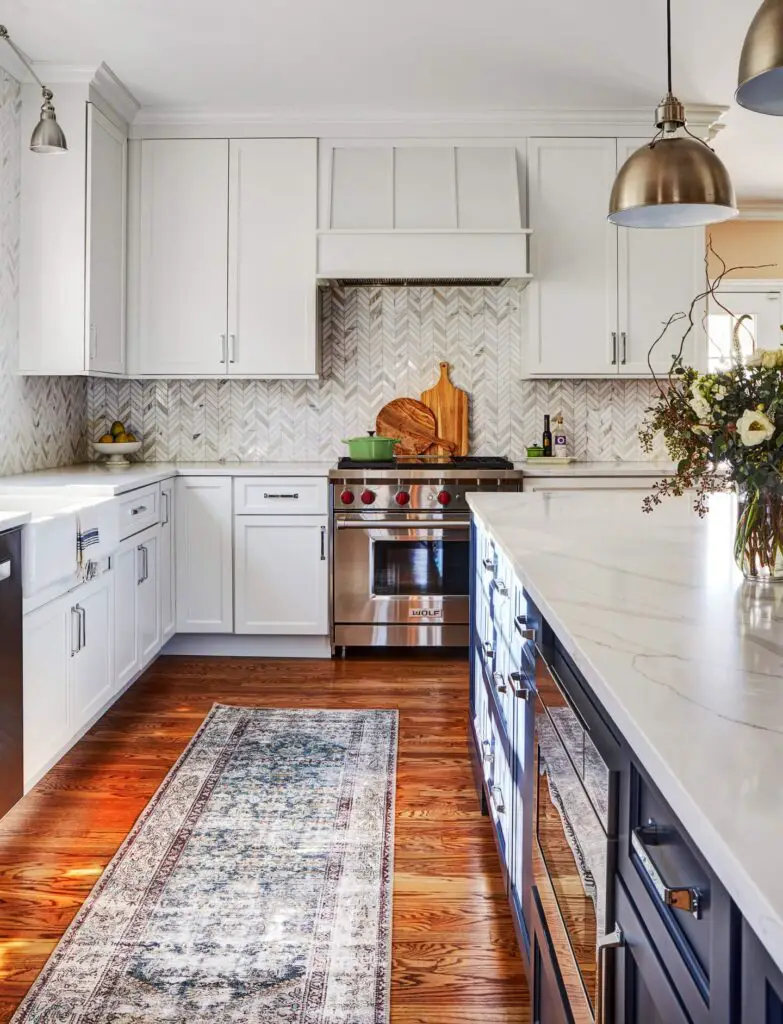
Range Hood Inserts

Range hood inserts are designed to be installed into a custom setting of some kind. Some people make this unit look like the surrounding cabinetry and disguise the range hood insert. Others simply prefer to install a custom option. They are available in both vented and unvented options.

Downdraft Hood

Kitchen and dining room designed in bright and dark colors
Used with permission of Jane Beiles Photography

A retractable downdraft hood is installed behind or beside the range and slides out of view when it’s not being used. While these hoods work by sucking air and fumes away from the stovetop, just like overhead hoods, they draw downward rather than upwards. While manufacturers claim that these hoods work just as well, some experts think otherwise. Since steam and hot air naturally rise, they think overhead hoods work more efficiently and completely. These hoods also cause a slight cooling effect around the cooking surface as it draws air.

Microwave Range Hood

Microwave range hoods are usually used in small kitchens where homeowners are trying to save counter space. By mounting the microwave over the range space on the counters and in cupboards can be used for other things. These microwaves are built with range vents in the bottom of them and work as vented or ventless hoods. Again, like the under-cabinet range hood, unless the kitchen was built with a range vent in the upper cupboard, the ducts will have to be retrofitted in order to make use of a vented hood.

Thanks to all the companies linked above.

4 Things To Do Before Hiring a Roofing Contractor

It’s essential to do your homework before hiring a roofing contractor. Check references, understand the scope of work, and ask for a written contract. You also want to ensure that the roofing contractor will be responsive if you have an emergency.

Photo by Michelle McEwen on Unsplash

Do your homework before hiring a roofing contractor

Before hiring a roofing contractor, you should do your homework to ensure that you’re getting a quality job and aren’t being taken advantage of. Unfortunately, there are many unscrupulous contractors out there, and you want to ensure that the company you hire will do a quality job. It would be best if you asked for references, checked the BBB, and did not sign a contract without reviewing it first.

If possible, try to hire a local roofing contractor. That way, you can ensure they are appropriately licensed and registered. You also want to ensure they have insurance, which is essential for a cape coral roofing contractor.

Photo by Sebi Nemteanu on Unsplash

Ask for references

Asking for references from past customers is an essential part of picking a roofing contractor. This will help you build a relationship with the contractor and learn about their previous work. Whether you’re interested in a complete roof replacement or a simple repair, references will allow you to see what the result will look like.

References from previous clients will help you determine how satisfied clients are with the service provided by your chosen roofing contractor. You can also ask to see photos of the roofs the contractor has completed. Some roofing companies will list the number of satisfied customers on their websites and emphasize positive reviews. Conversely, negative reviews can alert you to problems with the contractor. 

Photo by Sebi Nemteanu on Unsplash

Understand the scope of work

If you’re choosing a roofing contractor, it’s essential to know the scope of the project’s work. The content of the work should detail all tasks and materials used during the roofing project. It should also include payment schedules and insurance. A roofing contractor should also have the appropriate licenses and certifications.

It’s a good idea to research multiple roofing contractors before making your final decision. This will help you determine the quality of service and pricing for each. It’s also a good idea to ask each roofing contractor about their work scope. You may need a complete roofing system with accessories depending on your needs. These could include starter strip shingles, ridge cap shingles, and leak barriers.

Ask for a written contract

One of the first things you should ask any roofing contractor for is a written contract. This document will protect your home investment and ensure no surprises. A written agreement should specify the exact work scope and how payment will be made. It should also include payment schedules for materials and subcontractors.

Besides asking for a written contract, you should also ask for references. Many contractors have a database of past clients,, and their testimonials can give you a sense of the quality of their work. Moreover, it is best to choose a roofing contractor with sufficient experience to complete your project. Thanks to Roman Roofing for consulting.

What Are the Advantages of Kitchen Remodeling?

Kitchen remodeling can increase the size and functionality of your kitchen. Often, a kitchen can be small and difficult to navigate, and a remodel can add more space and improve the layout. As a result, you can use the space more efficiently and extend the kitchen area, making it more accessible.

used with permission from The Kitchen Studio

Cost-effectiveness

During the planning stages of your Kitchen Remodel, it is vital to consider the cost-effectiveness of your remodeling project. For example, if your home is worth $500,000, a remodel of $25,000 to $75,000 would be reasonable. Anything more than this will result in a reduced property value and could cost you money when you sell your house.

A kitchen can be costly and require financing, so save for it first. However, you can do a few things to keep your renovation costs minimum. For example, you can save money by avoiding significant trades and changing the kitchen’s layout to a more functional space.

used with permission from The Kitchen Studio

Return on investment

When considering a kitchen remodeling project, it’s essential to consider the return on investment. Depending on the size of your kitchen and the changes you make, a minor remodel can yield a much higher ROI than a major remodel. While a major kitchen makeover means a significant difference in the layout and structure of the kitchen, a minor makeover involves a smaller amount of money.

Another benefit of a kitchen remodeling project is the potential to increase the value of your home. Whether you’re selling your home or just trying to sell it, a remodel can reduce the time it takes your home to sell and lower the repair costs associated with the process. In addition, a renovated kitchen can prevent unexpected inspection findings or buyer demands for repairs and reduce the need for a compensatory price reduction.

used with permission from The Kitchen Studio

Increased space

One of the essential benefits of kitchen remodeling is the increased space it provides. Having a small kitchen limits the activities that you can do in it. It is often hard to fit everything into a small space, and you may even be forced to store some things in the living room. However, if you have a large kitchen, you will have plenty of space to work and walk around.

Another benefit of kitchen remodeling is improved aesthetics. New appliances can improve the kitchen’s appearance while making it more energy efficient. Old appliances can be inefficient and may not function properly. Additionally, they may not be in the best layout. You can replace outdated appliances with modern ones that work well by renovating them.

used with permission from The Kitchen Studio

Eco-friendliness

Kitchen remodeling can make a difference in the eco-friendliness of your home. First, however, you have to make sure you are making the right choices. Green materials, including recycled materials, can go a long way in making a kitchen more eco-friendly. Some options include recycled glass, paper, and cement.

If you want to make your kitchen more eco-friendly, consider hiring a certified green remodeling contractor. They will know which materials are the safest and most durable and can also make informed recommendations that will fit within your budget.

Increased functionality

One of the benefits of kitchen remodeling is increased functionality. Many homeowners report an improvement in their lives after the remodel. This is because the redesign improves traffic flow between workspaces and influences the placement of appliances. Adding additional counter space and more cabinets can also increase the functionality of a kitchen.

Improved storage

Adding extra storage space in your kitchen can improve your daily life and increase your home’s value. Kitchens with extra storage space tend to sell faster than those without them. Adding additional storage space can be as simple as extending your upper cabinets to the ceiling, which allows you to maximize the space.

By taking an inventory of your kitchen, you can figure out what you can improve with more cabinets and counter space. Then, you can plan the best storage system that will make the most use of space. For example, you may add an island with extra storage space. Thanks to Click It Floors for consulting.

7 Refurbishing Old Furniture Ideas You Can Execute At Home

Do you have an old piece of furniture that you’re looking to refurbish? We’ve got some refurbishing old furniture ideas for you!

There’s nothing like the feeling of taking something old, tired and worn out and giving it new life. Easily done with recycling, sanding, and repainting too! It makes you feel like a superhero—like you’re saving something from the trash heap of history and making it into something beautiful and useful again.

And while we don’t recommend trying to repair every piece of furniture in your home (that could get kind of pricey), some projects are doable on a budget. So if you’re looking for ways to give your old stuff new life, here are 7 refurbishing old furniture ideas that you can execute at home:

1. Turn a Trash Bin Into a Side Table

Living room with sofa and coffee table
Used with permission of Kira David Design

If you have any old trash or recycling bins laying around your house, you can turn them into cute side tables with a little bit of effort. All you need is a power drill, some screws, and paint to work on refurbishing old furniture ideas.

First, take your trash bin apart by removing all of the screws and unscrewing the hinges that hold the lid on. Then, sand down any rough edges with sandpaper and paint it if desired. We recommend using white primer.

Once it’s dry, put it back together! You can use small nails to attach legs to the bottom of the bin so that it sits flat on your floor; alternatively, if you’re feeling more ambitious, try cutting wood boards for legs and adding them to the bottom of your bin afterward.

2. Repaint & Update an Old Lampshade

Updating a lampshade is one of the easiest refurbishing old furniture ideas to give a room a whole new feel. If you have an old lamp but don’t like the shade, pick up some paint and give it a fresh coat! 

You can also use stencils and create your unique pattern on the shade. If your lamp already has a beautiful pattern, try spray painting over it in different colors to add more depth to your space.

3. Transform Old Rectangular Baskets into Modern Weave Laundry Hampers

Remove the lid of your old basket and set it aside. Then, measure out equal spaces that are 3 inches wide throughout the bottom of your basket, making sure each piece is even with the other—you don’t want any gaps between them! 

To make sure this happens, we recommend using a ruler or tape measurer on top of where you want to place your next side piece before hammering it in place; this way, there will be no space when finished!

Once all sides are hammered in securely (and evenly), turn over and give them all a few coats of white spray paint! Finally, reattach the lid onto the bottom by placing it into position from inside outwards until a snug fit occurs around every edge.

4. Make a Vintage Crate Side Table with Storage From Upcycled Wooden Crates!

Photo by Lindsey LaMont on Unsplash

All you need is some wood putty, a paintbrush, and some sandpaper. You’ll also need an old crate or two — if you don’t have any on hand, check with your local thrift stores or antique shops.

Take your crate apart and use the pieces to create the tabletop base of your table. Paint the base in any color you like and let it dry completely before continuing with the next step: adding storage compartments!

Use wood putty to fill in any gaps between your crates so that they fit together tightly—this will create hidden compartments for storing small items like keys or change. Finally, sand down any rough edges and give everything a coat of polyurethane to protect it from water damage over time!

5. Make a Magnetic Chalkboard Wall Calendar out of an old window frame

Another refurbishing old furniture ideas that you can try at home is creating a magnetic chalkboard wall calendar using an old window frame.

All you need is an old window frame, magnets, and some chalkboard paint. Paint the back and front of the frame with two coats of chalkboard paint, let it dry, then mount it on the wall using L-brackets. Add some magnets to the back of each month’s card (or just use pushpins), update them as needed throughout the year, and enjoy your new magnetic chalkboard wall calendar!

6. Old Chair into a Garden Bench

Have you ever wanted to have your garden bench but didn’t have the money to buy one? We have the sixth refurbishing old furniture ideas to help you out.

Take an old chair, remove the legs and place them on the bottom of the seat section. Make sure that it is level and strong enough by testing it out with some weights before you start adding in any other materials. You can also repaint it by sanding it out first and painting in the new color.

Yard with palm trees, table and armchairs
Used with permission of Blackband Design

You can then add some cushions or pillows for comfort, but keep in mind that this will add more weight to the chair and make it less sturdy. You may want to consider removing some of these if you’re planning on using this bench outside instead of inside your home. If so, consider using plastic bottles filled with sand instead of pillows and cushions so that they won’t get wet when it rains or snows outside!

Once everything looks good and feels comfortable, paint over all sides of your new bench with a white finish paint so that it matches better with other wooden benches around your yard or garden area.

7. Turning an old dresser into a bar cart

Refurbishing old furniture ideas can also be bar ready. If you have an old dresser starting to appear worn out, try turning it into a bar cart! 

First, remove the drawers and any handles. Then, sand down any rough edges or splinters on the wooden surface of the dresser. You can do this by hand or with a power sander (if you’re feeling ambitious).

Next, fill all of the holes from where you removed the handles/drawers with wood putty . Let that dry completely before applying two coats of primer and two coats of paint in whatever color you like!

Once your new bar cart is dry, add wheels to the bottom if necessary and fill it with whatever drinks/supplies you want to keep on hand for your next party!

Refurbishing old furniture ideas your way

Designed living room
Used with permission of Breeze Giannasio

The great thing about these ideas is that they’re all simple enough to do yourself. There are no complicated steps involved, so you don’t need any special tools or skills in order to complete them successfully. If you’re looking for ways to reuse old furniture in your home, these refurbishing projects are perfect!

4 Ways To Create Backyard Lawn Shade

It always feels amazing to spend time outside, unwind on a comfortable chair, sip a cool beverage, and hang out with family and friends in your backyard. However, when you do not have shade or trees, the sun will make this experience a scorching misery, and you have to get back inside. Also, Spending too much time outside can be risky if there is no shade in your backyard. Fortunately, some ways, such as using gazebos for shading your lawn, provide shade without planting trees and give an aesthetic appeal too.

House entrance with front yard
Used with permission of Patterson Custom Homes, Architect: Brandon Architects

Below are some sun-blocking suggestions that will let you enjoy your time in your backyard even when the sun is shining.

Shade Sails For Your Lawn

A shade sail is a sizable retractable sail connected to a pole, the back of your house, or any other structure. It extends outwards, thus providing you shade and protection from UV rays. It is constructed of knitted polyethylene cloth. It is one of the simplest forms of sun protection you may apply in your backyard.

Because these sails are available in a wide range of colours and shapes, including square, rectangular, and triangles, it is simple to pick one that complements the outside of your home or the landscaping of your garden. The fabric has eyelets punched in the corners, and they are linked to the poles with the aid of wires and strong rope. They are firmly fastened, so there won’t be a problem even in a windy environment.

Install Gazebos In Your Lawn

Yard in the suburb and man watering the plants
Used with permission of Jane Beiles Photography

By constructing a gazebo, you are not providing your backyard shade, but it will also enhance your garden appeal and style. It is a longer-lasting construction that turns your outside area into a cool haven. Gazebos for shading your lawn can be made with wood or other materials such as vinyl, aluminum, etc.; you can customize the shape according to your garden aesthetics and needs. Larger gazebos can hold fire pits, tables, and chairs.

They are ideal for a gathering, having a dinner party, enjoying your morning coffee, or meeting up with friends. To make the area more pleasing to the eyes, you can decorate it by handing flower boxes or design it any way you want. Gazebos are a distinctive focal point for your garden and, when constructed properly, can last for many years.

Build A Pergola

Pergola comprises four posts that support four crossbeams or a combination of beams. Pergolas are a flexible and versatile option, particularly in regions that receive a lot of sun. Pergolas provide additional shade without totally obstructing the sun’s rays, and you may hang screens or drapes to prevent the sun’s glaring beams as it sets or rises.

Front yard and houses
Used with permission of Patterson Custom Homes, Architect: Brandon Architects

These work well in vast yards or on modest patios. If you require more protection or shade, you can try to grow wisteria and create a beautiful canopy, or you can always cover it with a cotton tarp.

Plant Shrubs And Plants

You can create a beautiful walkway canopy and provide shade by planting short shrubs and flowers. Also plants and shrubs cools down the area too. Plants between 1 and 3 feet tall are ideal for creating the most shade. You can also mix and match the plants to create a beautiful garden.

Conclusion

Spending time in your yard during the hottest months is more fun if you use plants to add shade. Also, being outdoors doesn’t mean being in the sun. It’s good to unwind occasionally in an area protected from the sun’s glaring rays. An outdoor area can be shaded in various ways, including with gazebos, pergolas, and other structures.

Thanks to groundsguys.ca for consulting.

Top Benefits Of Tree Transplant You Must Know About

If you have an existing tree, then you must be happy with it. It is the same as any other thing in this world—it requires maintenance and care. The only difference between other things and trees is that they are alive and need more attention than a normal object does.

Tree transplanting is one of the best ways to get your tree healthy again. But before making the decision to transplant your tree, you should know about its benefits first:

Tree transplanting is a unique way to care for your trees

Backyard with lawn and olive tree
Used with permission of Breeze Giannasio

Tree transplant involves digging up the whole plant, moving it to an area with better soil, then replanting it in the same position as before. This process can be done either manually or mechanically, depending on how many plants are involved.

This process involves cutting down the roots from above, which results in several advantages:

  • A new root system will form that can access new nutrients below ground level
  • More air will be available at ground level due to less shade being cast over this area

It is a cost-effective and quick method

Tree transplanting is the best choice for people who want to move their favorite trees from one point to another.

It is also an eco-friendly method because it does not require any chemicals or pesticides that can harm other plants and animals. You can use this technique to plant fruit trees, vegetables, flowers, or even shrubs you like.

With tree transplanting, you can take care of your favorite trees

Yard with palm trees, table and armchairs
Used with permission of Blackband Design

You can take care of your favorite trees by transplanting them. You can ensure that the tree is in a healthy environment and properly cared for.

With tree transplanting, you can ensure that the tree has space to grow as it would in its natural habitat.

A large tree can also be transported easily

Tree transplanting is a safe and easy way to transport trees because they are moved with a crane and wrapped in netting that protects them from damage.

The person who performs this service will first dig around the plant’s roots so that it can be gently lifted out of its original position, then placed into its new location. Even though this sounds like an involved process, it does not take much time at all for these professionals to complete their work!

It allows you to maintain the beauty of your garden

Backyard with olive tree, table and chairs
Used with permission of Blackband Design

You can easily move your favorite trees from one place to another. It is an affordable and quick method of maintaining the beauty of your garden by giving it a new look and feel without having to dig up the entire thing.

Tree transplanting also allows you to take care of your favorite trees, especially if they are too old or damaged by pests or diseases. Due to their size and weight issues, tree transplantation becomes more feasible when a large tree needs to be transported, such as those used in construction sites.

Conclusion

In conclusion, tree transplant is an easy process with many benefits. If you are looking for a new tree or your current tree needs some work done on it, these tips can help you out!

Thanks to grupomundoverde.mx for consulting.

Essential Outdoor Maintenance Tasks To Add to Your To-Do List


During the warmer months, the average American devotes an impressive 53 hours of manual labor around the house and yard each month, according to one survey. However, when looking to keep the exterior of your home in good working order, there are plenty of maintenance tasks that can go overlooked. From the value in keeping outdoor drains working properly to ensuring that the outdoor dryer vent is clean, here are just a couple essential tasks worth adding to your to-do list.

Used with permission from Chestnut Grove Designs

The importance of maintaining outdoor drains 

When looking for outdoor maintenance tasks to ensure your home is properly maintained, outdoor drains are one feature that should always be kept clean. This is primarily due to the fact that clogged outdoor drains can result in flooding, which can become a major issue (and can potentially result in damage), for instance, if the drain is located in a basement stairwell. With that in mind, a variety of factors can result in an improperly working outdoor drain, whether it be a buildup of debris from a storm or lack of cleaning. Outdoor drain maintenance is particularly important in areas that receive a lot of precipitation, including cities such as New Orleans, New York, or Memphis. However, ensuring that outdoor drains are functioning properly is necessary during rainy seasons as well, regardless of location. Central Indiana, for instance, received nearly 19 inches of rain in the spring of 2019, which is higher than what’s considered a normal amount of rain during that period (which is a little over 13 inches), according to one IndyStar article.

For homeowners with outdoor drains, addressing one that is draining slowly can be an easily overlooked task, despite the fact that doing so can prevent a complete clog. While minor clogs can often be addressed in a DIY fashion, it’s essential to use safe methods in order to maintain the integrity of the pipes. For example, it’s important to avoid pouring store bought drain cleaning chemicals down the pipes, as they can often be extremely abrasive (instead, using a store bought snake can present a better DIY option). However, for larger jobs that require professional drain cleaning services may use a professional-grade drain snake or rooter, while tougher, more stubborn clogs may require hydro jetting.

Used with permission from Chestnut Grove Designs

Cleaning the outside dryer vent

Maintaining the outside dryer vent is yet another common chore that goes overlooked, especially when considering the fact that fires that start from clothes dryers that are clogged with lint are “second only to kitchen fires as the leading cause of home fire damage,” notes one article from The Spruce. In addition to emptying the dryer lint screen after every load, maintaining the dryer vent system also plays a role in a properly running dryer. As for how frequently this task should be done, The Spruce notes that the outside dryer vent “should be cleaned and checked quarterly to increase the airflow in your dryer,” further going on to say that “This will speed the drying time for laundry and help prevent moisture problems in your home.” After inspecting the vent opening and the vent itself, it’s noted that removing lint and debris can be done with your hand or a long-handled wire brush.

Used with permission from Chestnut Grove Designs

For those looking to ensure that their home’s exterior is properly maintained, there are a variety of tasks to do — some of which may go overlooked. By ensuring that your outdoor drains and dryer vents are cleaned on a regular basis, you can tackle just two tasks that are essential in preventing damage and maintaining the function of your home.

Trendy Types of Shower Doors for Your Bathroom

You have a few options when looking for a new shower door for your bathroom. Framed glass shower doors are a popular choice among homeowners because they are inexpensive and easy to customize. They can match the style of other bathroom fixtures and are available in various colors. Popular colors include chrome, nickel, and matte black. Some homeowners like to add an old-school feel with brass or bronze shower doors.

Piping Hinged Shower Doors 

The most popular shower door style is the frameless type. These doors feature a frameless design, but they still contain a glass panel made of 3/8 to 1/2 inch thick glass. However, these doors require frequent cleaning and maintenance because the track collects water. They are also a bit more expensive than framed doors, so it’s important to consider your budget before purchasing them.

Another critical factor to consider is space. If the space in your bathroom is small, you may want to consider installing a screen. This way, the door will be easily accessible and won’t obstruct the rest of the bathroom.

Used with permission from Chestnut Grove

French-Door Shower Doors 

The French-door shower door has a timeless look that fits in with a rustic or country-style bathroom. This shower door style is also efficient, allowing a large amount of natural light to enter the bathroom. While this type of door was traditionally associated with country homes, it is increasingly making its way into modern homes. Many French-door-inspired shower enclosures are available at a variety of price points. They are an inexpensive way to add a classic feel to even the smallest bathroom. Another option is a stationary panel, which is much cheaper than a folding door. In addition, this type of door eliminates the need for a shower curtain and prevents water from spraying out of the shower head.

Used with permission from Chestnut Grove

Bi-Fold Shower Doors 

Bi-fold shower doors are excellent for smaller bathrooms and offer great versatility. Available in a frameless or framed design, these doors give a bathroom a sleek modern look. They also use minimal space and offer easy entry and exit. In addition, when closed, bi-fold shower doors keep water inside the shower. Bi-fold shower doors are designed to be easy to install and fast fit. The frameless glass of these doors creates a more spacious look, even for small shower spaces. Another great option for shower doors is the pivoting door, also known as a swinging or hinge door. This door is available for the most popular shower enclosure sizes ranging from 27 to 36 inches. The pivoting door opens and closes like a regular door and is easy to install anywhere.

Used with permission from Chestnut Grove

Frameless Shower Doors 

If you’re interested in a frameless shower door, you should know that various types exist. These include wall-to-glass hinged doors, which swing inwards or outwards. Pivot shower doors are also available and feature simple pivot hinges. These types of doors can also be customized to suit your preferences.

The most significant advantage of frameless shower doors is that they are sturdy. They are also easy to clean since there are no frames around the glass panel. This means you don’t have to worry about water deposits and soap scum collecting on the glass panel.  Choosing a frameless shower door is an excellent way to change the look of your shower area and save money. They open up small spaces and blend with existing interior design elements. In addition, frameless glass shower doors are environmentally friendly. They’re entirely recyclable and do not emit harmful gases into the air. Thanks to Go Banking Rates for consulting.

Tips to Make Your Home More Energy Efficient

Whole Home

An energy-efficient home starts with considering ways to reduce your overall footprint. A quality home solar installation is going to save you thousands of dollars over the life of your home. You can find solar panels that blend in with your roof to improve the aesthetics while also providing energy savings. 

In addition to home solar panels, take a look at your windows to make sure you don’t have any cracks or gaps that could be aiding in energy loss. Seal any deficiencies to prevent energy loss. If you have old, single-pane windows, consider investing in double-pane options to improve your overall footprint while lowering your monthly bills.

Used with permission from Kira David Design

Kitchen

Your kitchen is one of the most-used rooms in the home, so it’s safe to say that there is a lot of potential for energy savings. If you own older appliances, they may be the biggest culprits for energy loss. Invest in energy-efficient options that use less electricity and gas. After investing in more efficient appliances, consider purchasing cookware that will conduct heat more efficiently, such as copper options. 

Rather than washing your dishes by hand, opt for a dishwasher. Dishwashers often produce water more efficiently than you would be running the tap while you scrub your dishes by hand.   

Used with permission from Kira David Design

Bathroom 

After investing in a home solar installation and energy-efficient kitchen, it’s time to consider ways to reduce your carbon footprint in your bathroom. Showering produces significant amounts of water, which can be wasteful, especially if you have a large family. Since you can’t, and shouldn’t, stop showering together, opt to install a low-flow showerhead, which produces less water to save you money and energy. Check your faucets to make sure they aren’t leaky; a small leak can add up over time and shouldn’t be ignored.

Used with permission from Kira David Design

Bedroom and Living Room

Whether it’s your bedroom, living room, or any other location in the house that has a television, you can save energy. Look for Energy Star televisions, which are made to be efficient. Smart TVs are also a great option because they have sensors that turn the television off after being idle, so you don’t waste energy running a unit that isn’t being used. 

Used with permission from Kira David Design

Attic

If you don’t regularly use your attic, you may not think about how much energy can be lost through this space. However, attics are a major source of energy loss, so check yours to see if there are any gaps or inefficiencies. If you upgrade your attic’s insulation, you’ll see major energy savings and lower monthly utility bills. 

Conservatory

Households with conservatories can use up to 13% more energy when heating this room, mainly due to a lack of proper insulation. That’s why more and more homeowners are opting for conservatory roof insulation; not only to improve energy efficiency and cut down on utility bills, but to make it a room that can be enjoyed all year round. 

Whether you choose home solar installation, investing in newer appliances, or re-insulating your attic, you’re doing your part to help the environment by reducing your overall carbon footprint. Thanks to Freedom Solar Power for consulting.

5 Mistakes to Avoid When Shopping For a Fire Pit

A fire pit is a wonderful addition to any outdoor space. Whether you’re entertaining guests, roasting marshmallows with the kids, or enjoying an evening with your spouse, nothing beats setting up an outdoor fire pit and letting the flames crackle under the stars. If you have been considering adding an outdoor fire pit to your backyard but aren’t sure how to go about it, read on!

Choosing the Wrong Size

Fire pit
Photo by Tyler Delgado on Unsplash

When choosing a fire pit, you want to ensure it is the right size for your space. If it’s too small, you won’t be able to enjoy the warmth and ambiance of fire; if it’s too large, you could have trouble getting close enough to feel any heat.

The easiest way to measure your space is by drawing out the dimensions on graph paper. Then use those measurements to look for outdoor fire pit lounge sets. Alternatively, measure the spot where you plan to put your new fire pit and use those numbers.

Not Reading the Manual

The manual will give you important safety information about operating and cleaning your new gadget properly. Make sure you understand how to use your fire pit. If any buttons or knobs need to be pushed to get the flames going, ensure they are all turned on before lighting up your fire pit.

Furthermore, be aware of where children and pets are when operating a fire pit. Keep them far away from the area where people sit around the flames because they can easily get burned if left unattended.

Installation on a Wooden Surface

Installing a fire pit on a wooden surface is not recommended. The heat of the flames and embers can cause damage to the wood and even cause your fire pit to catch on fire. A simple fix for this problem would be to install your fire pit on concrete instead of wood. This will prevent any damage and protect your fire pit against any heat the flames might produce.

Ignoring the Importance of Ventilation

The importance of ventilation is often overlooked when shopping for a fire pit. To keep your family safe, you must ensure adequate airflow around the burning area. This will prevent carbon monoxide poisoning, smoke inhalation, and overheating.

It’s also important to consider how the flame might spread if left unchecked. It would be best to choose a fire pit built with enough space between itself and other structures so as not to catch nearby objects on fire.

Neglecting Safety Features

Safety is the most crucial part of any fire pit. If you don’t prioritize safety, you could risk putting yourself and your loved ones.

Here are some features to look for on your next fire pit shopping expedition:

  • A spark screen — All open flames produce sparks, but there’s no need to let them fall into your yard or, even worse, go up in smoke. A spark screen will protect you and the landscape from embers scattered by wind gusts or accidentally sizzled by raindrops before reaching their intended destination.
  • A lid — Most people think about keeping their hands safe around a hot object like a campfire or grill when they cook outside, but what about your face? Protecting yourself from burns caused by direct contact with burning logs and smoke inhalation is essential if you enjoy these activities outdoors every summer night.

Final Word

Backyard with lawn and trees
Used with permission of Breeze Giannasio

Whether you’re planning to use your fire pit in the backyard or as a, there are many factors to consider when purchasing. We’ve tried to cover some of the most important ones here and hope they help you find them useful. Thanks to AThrifty Mrs for consulting.